Download as a PDF
A Solicitor's Guide to Quantum Collaborate
/A Solicitor's Guide to Quantum Collaborate
/Accessing Quantum Collaborate
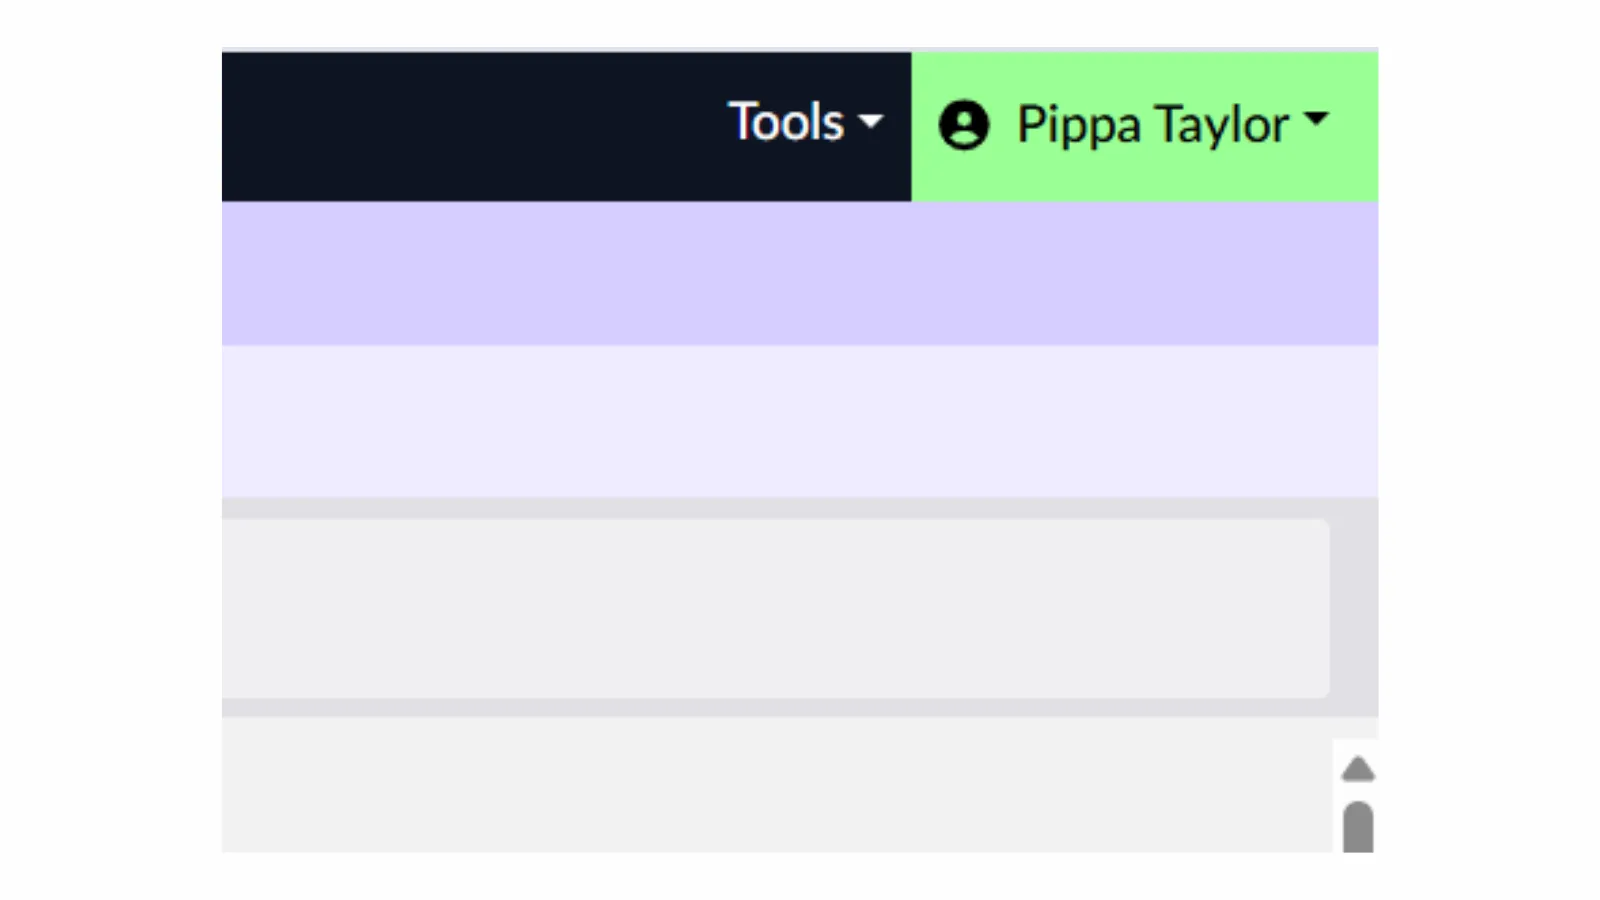
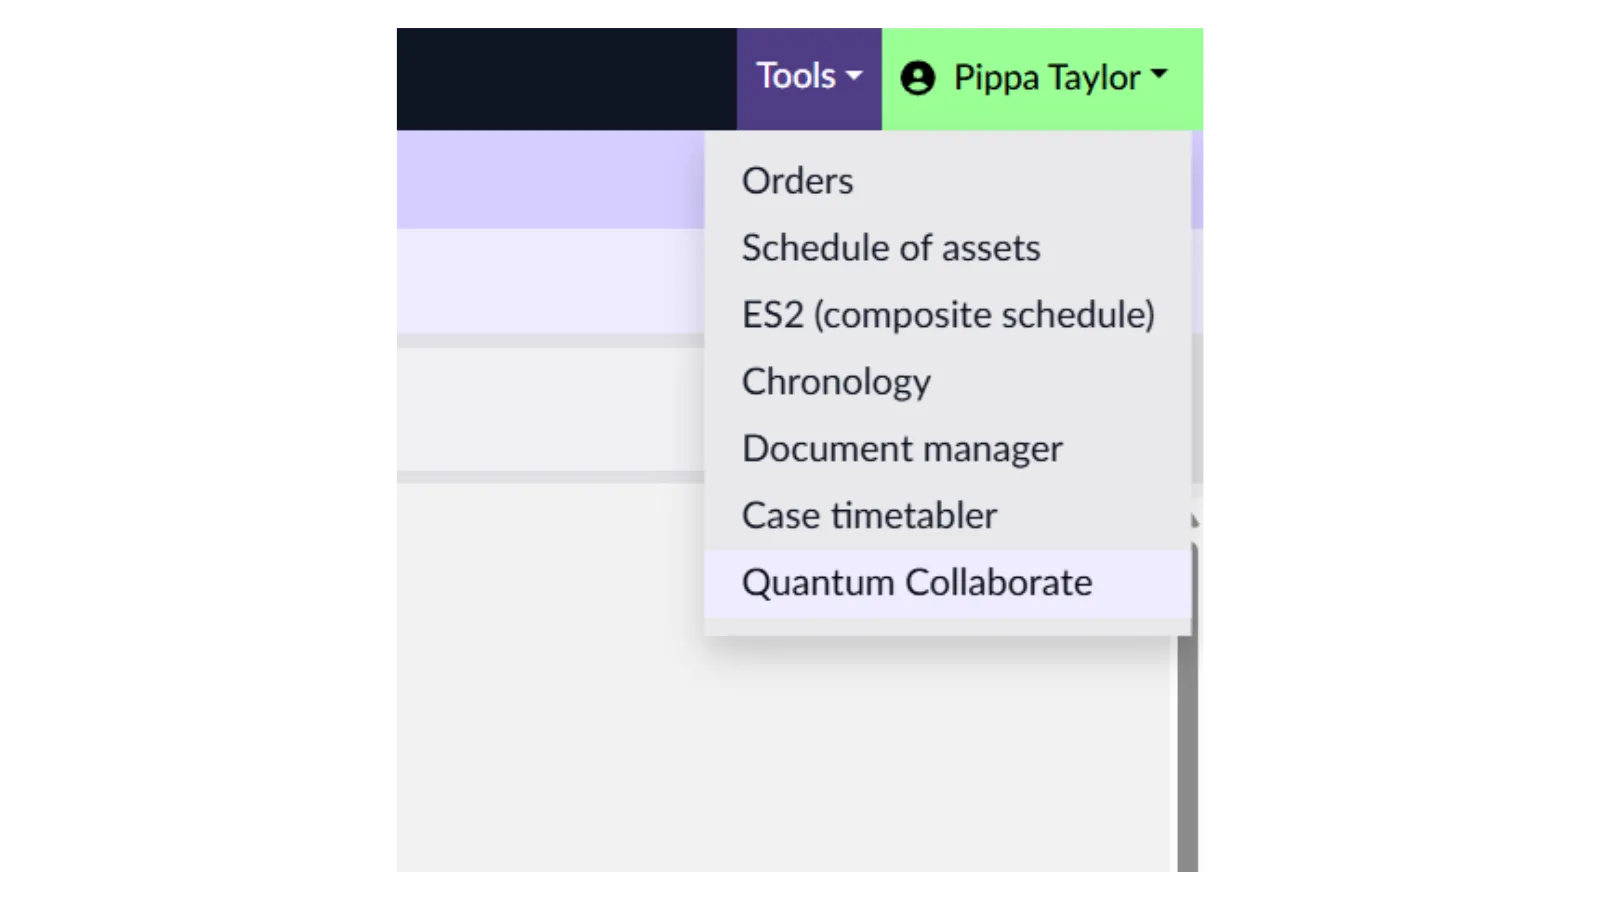
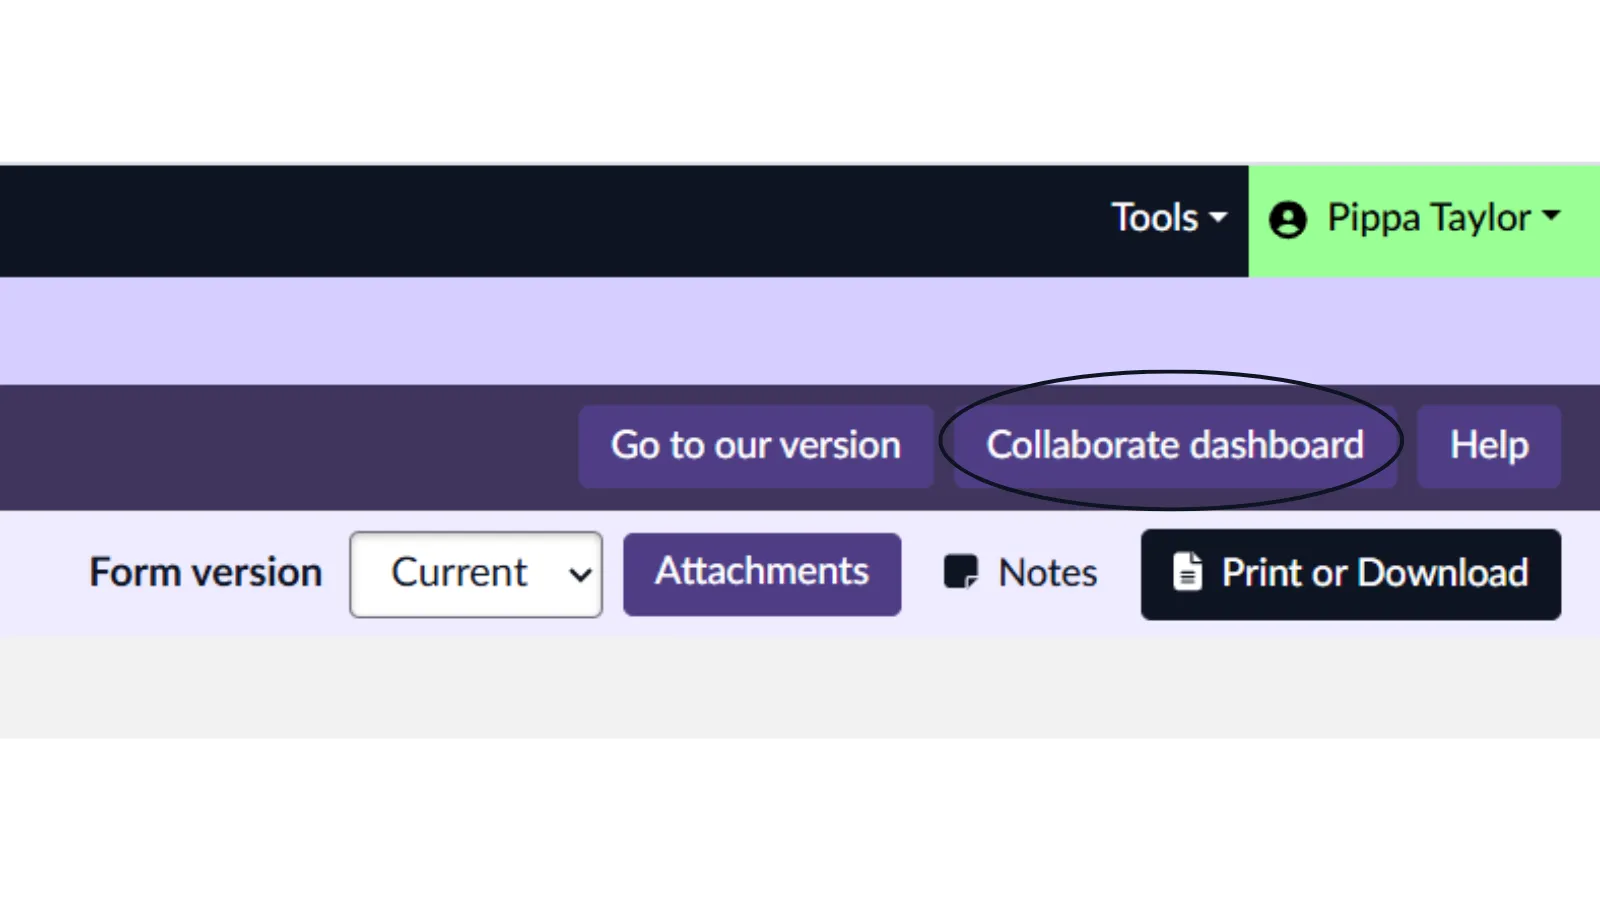
Quantum Collaborate can be accessed from the Tools section in Quantum Cloud.
Click the ‘Tools’ menu and select ‘Quantum Collaborate’.
Collaborating with a client or counsel
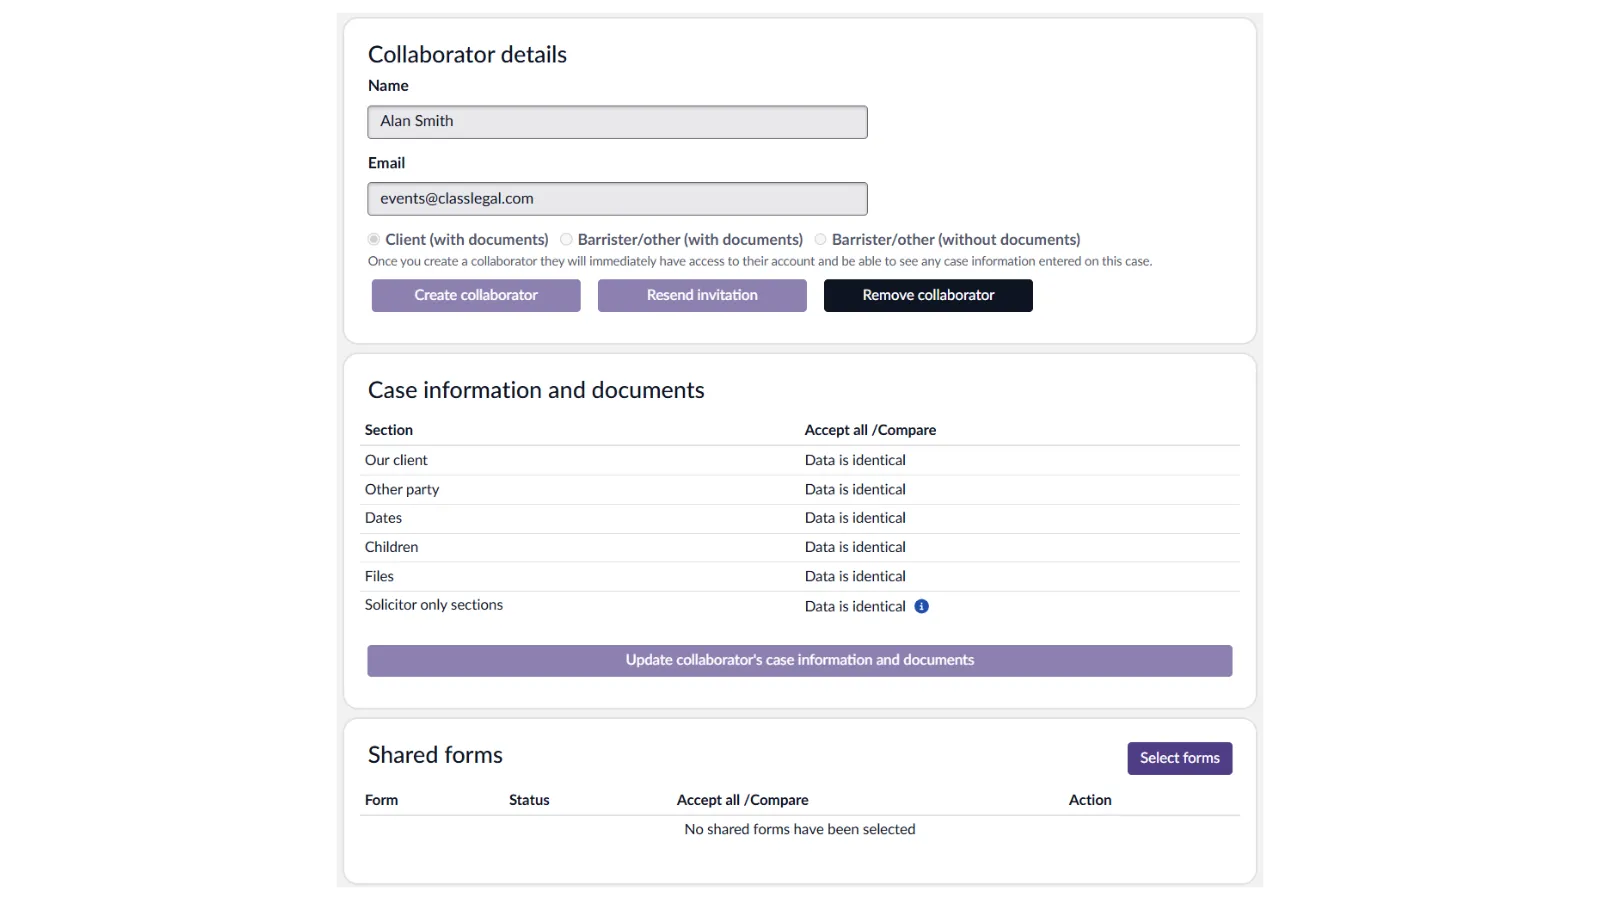
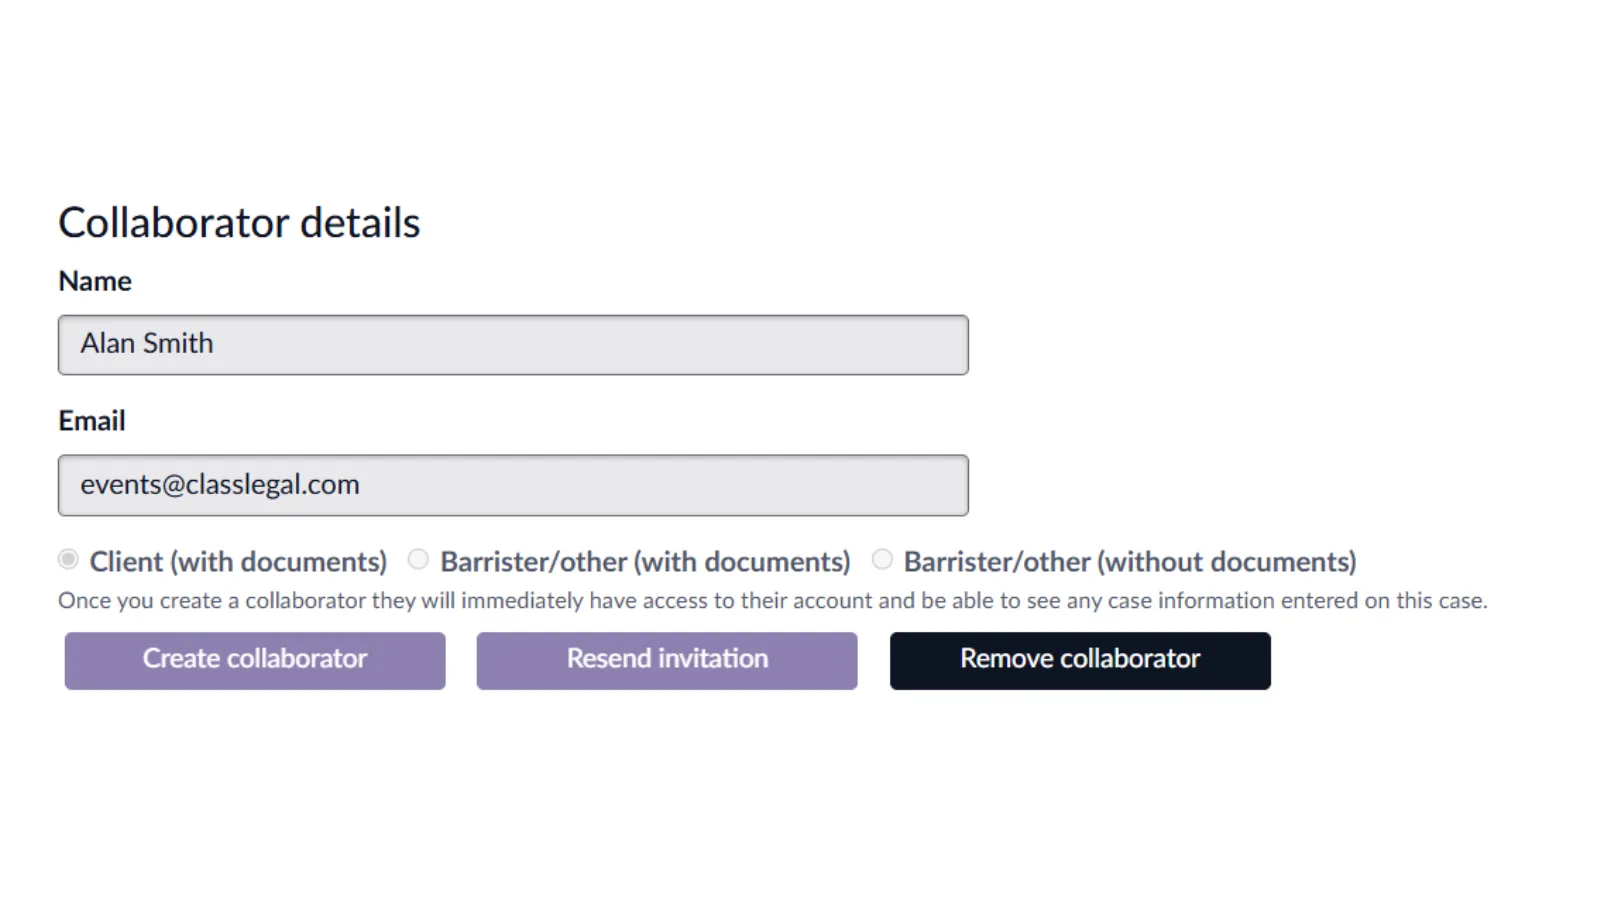
Enter the name and email addresses of the person you want to collaborate with and select if they are a ‘Client (with documents)’, ‘Barrister/other (with documents)’ or Barrister/other (no documents).
Please note that any documents you have uploaded to your case will be visible to the person you want to collaborate with unless you select ‘Barrister/other (no documents)’, this is useful when sharing a form with the other sides solicitor.
When you are ready to send your invitation click ‘Create collaborator’. This will send your collaborator an email with instructions for accessing their account.
Please note that Quantum invitation emails will expire after 48 hours. If your collaborator has not logged in before this time, you can resend their Quantum invite by selecting the ‘Resend invitation’ button.
Once you have created your client as a collaborator, they will be able to complete and amend their case information and any differences between your and their data will be highlighted as below.
Sending forms and documents through Collaborate
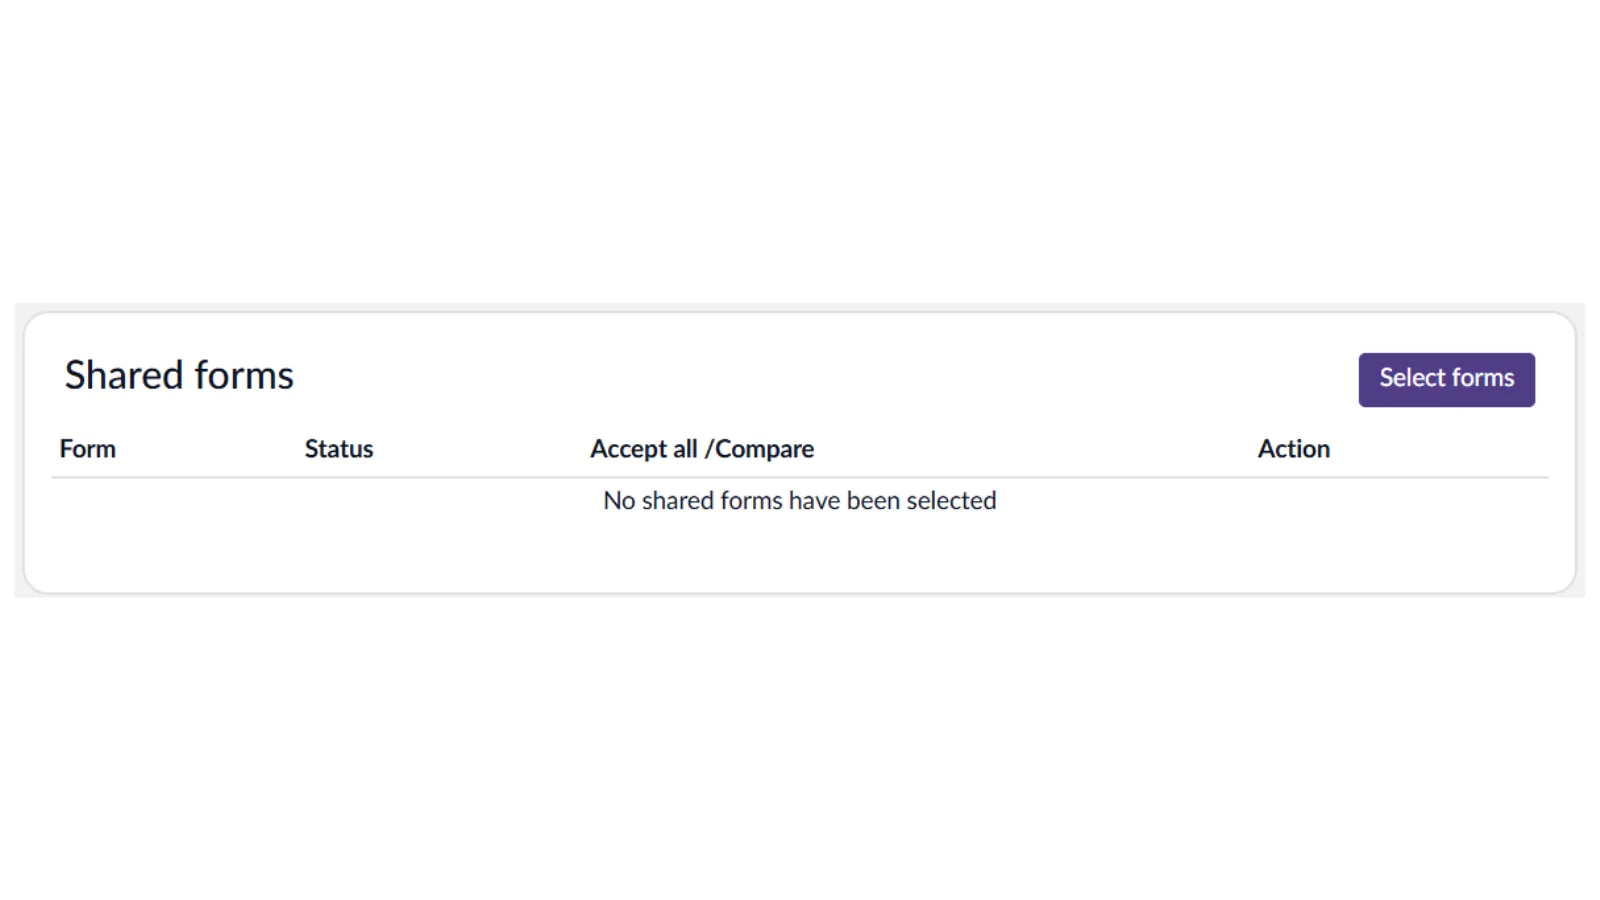
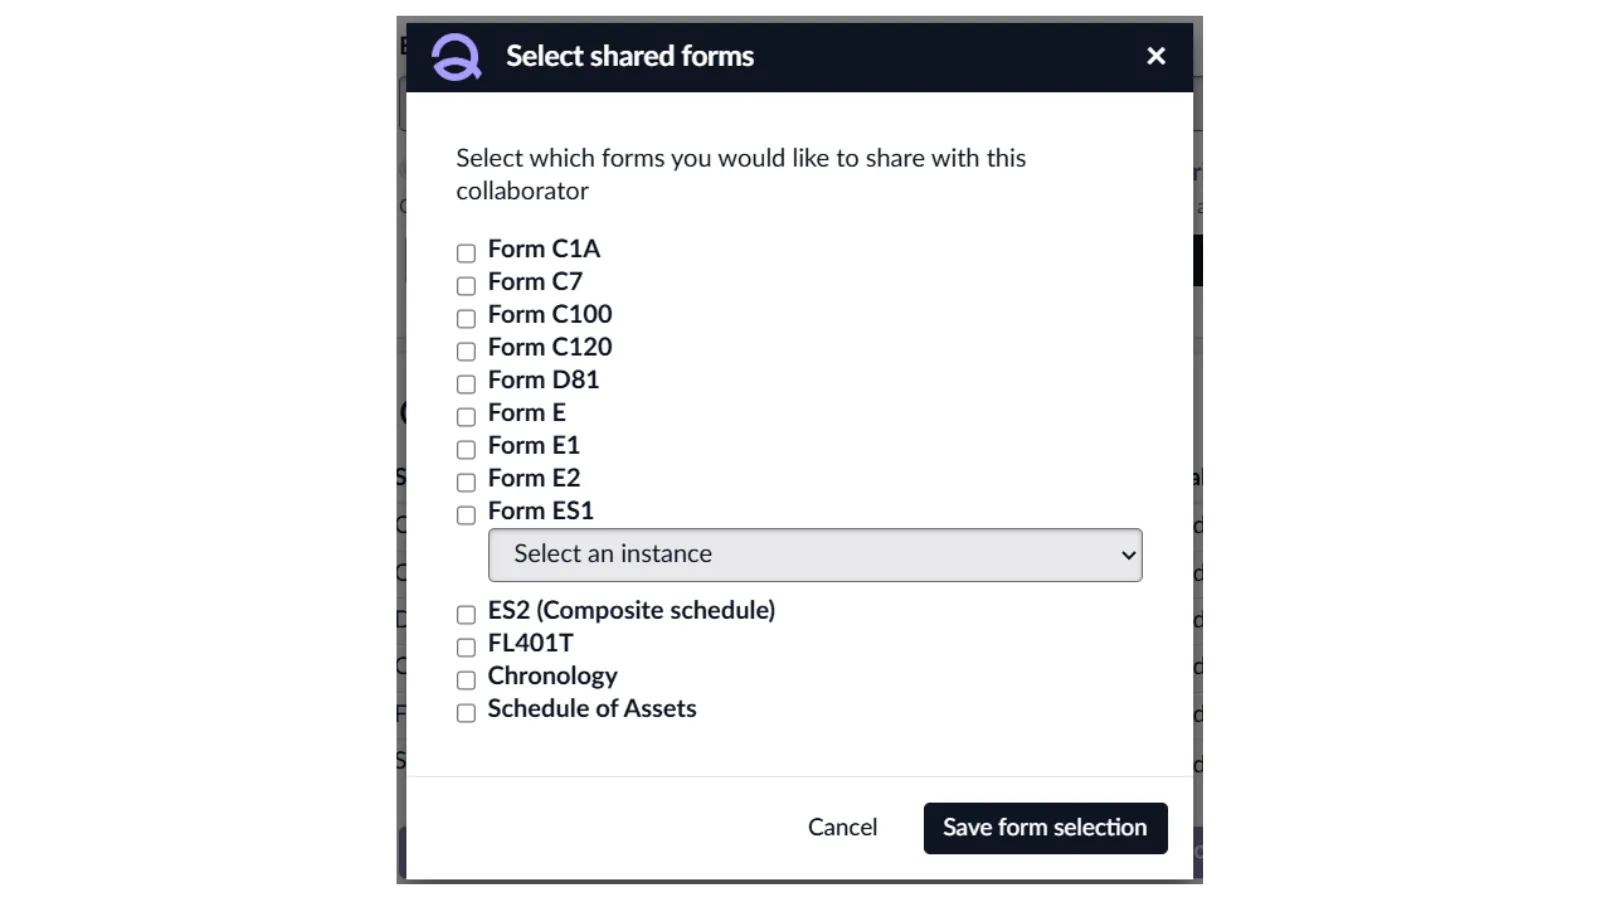
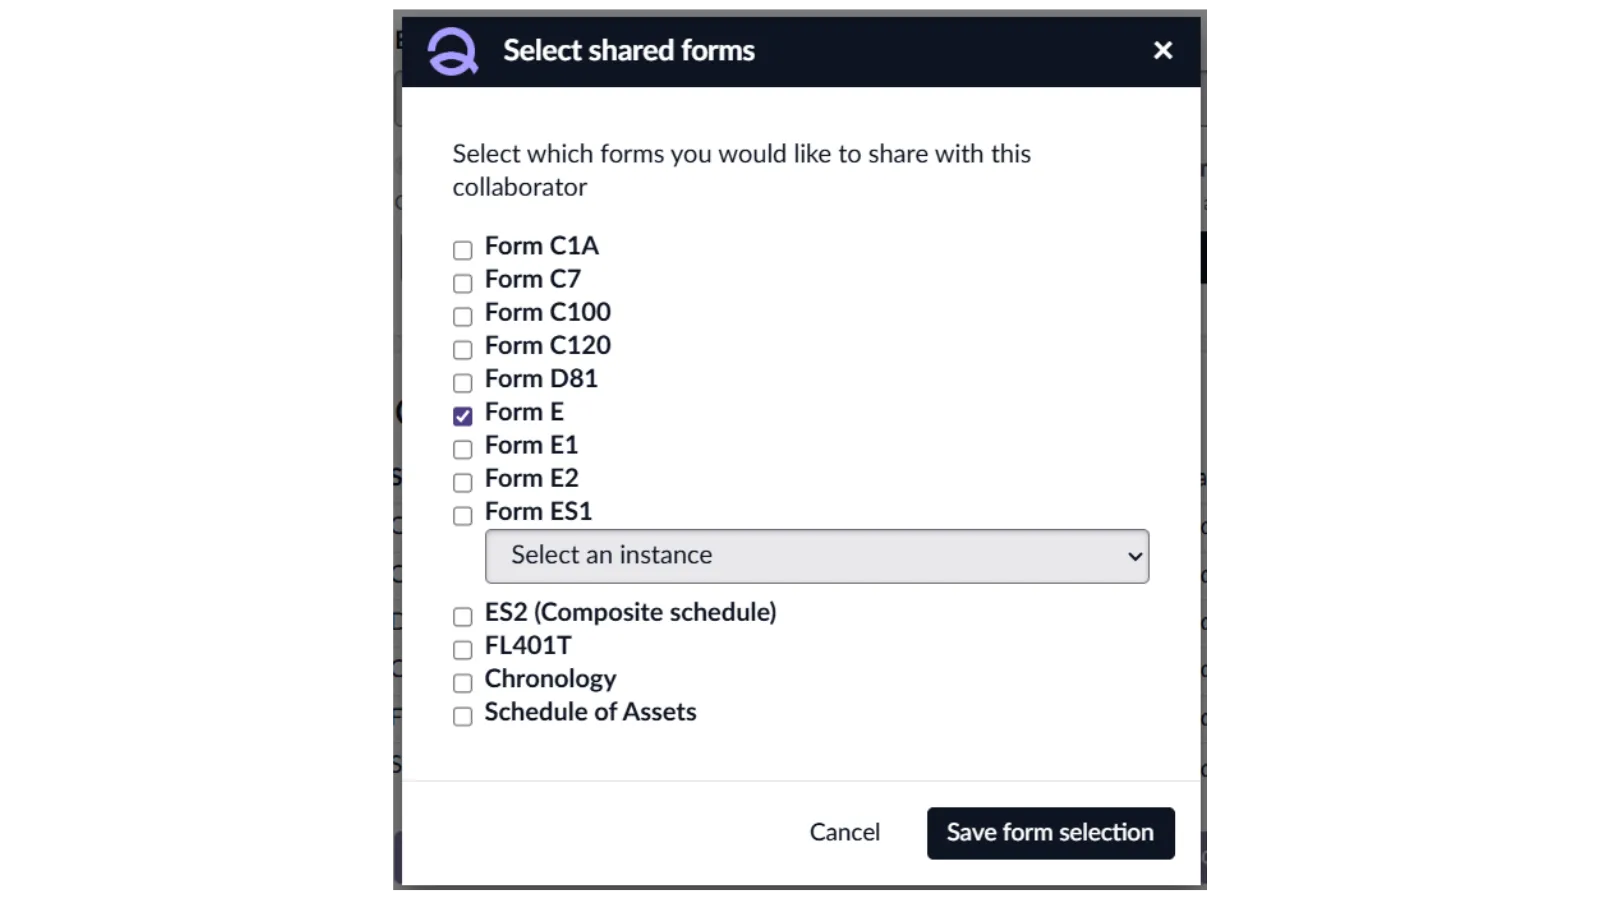
You can select which form(s) to collaborate on by clicking the ‘Select forms’ button.
A pop up will appear with a list of the forms and documents you can share within Quantum Cloud.
Use the tick boxes to the left of the form names to select which forms you would like to send to your collaborator. You can select as many forms and documents as you wish.
Once you are happy with your selection, click ‘Save form selection’ to send them to your collaborator.
Reviewing collaborator changes - Case Information
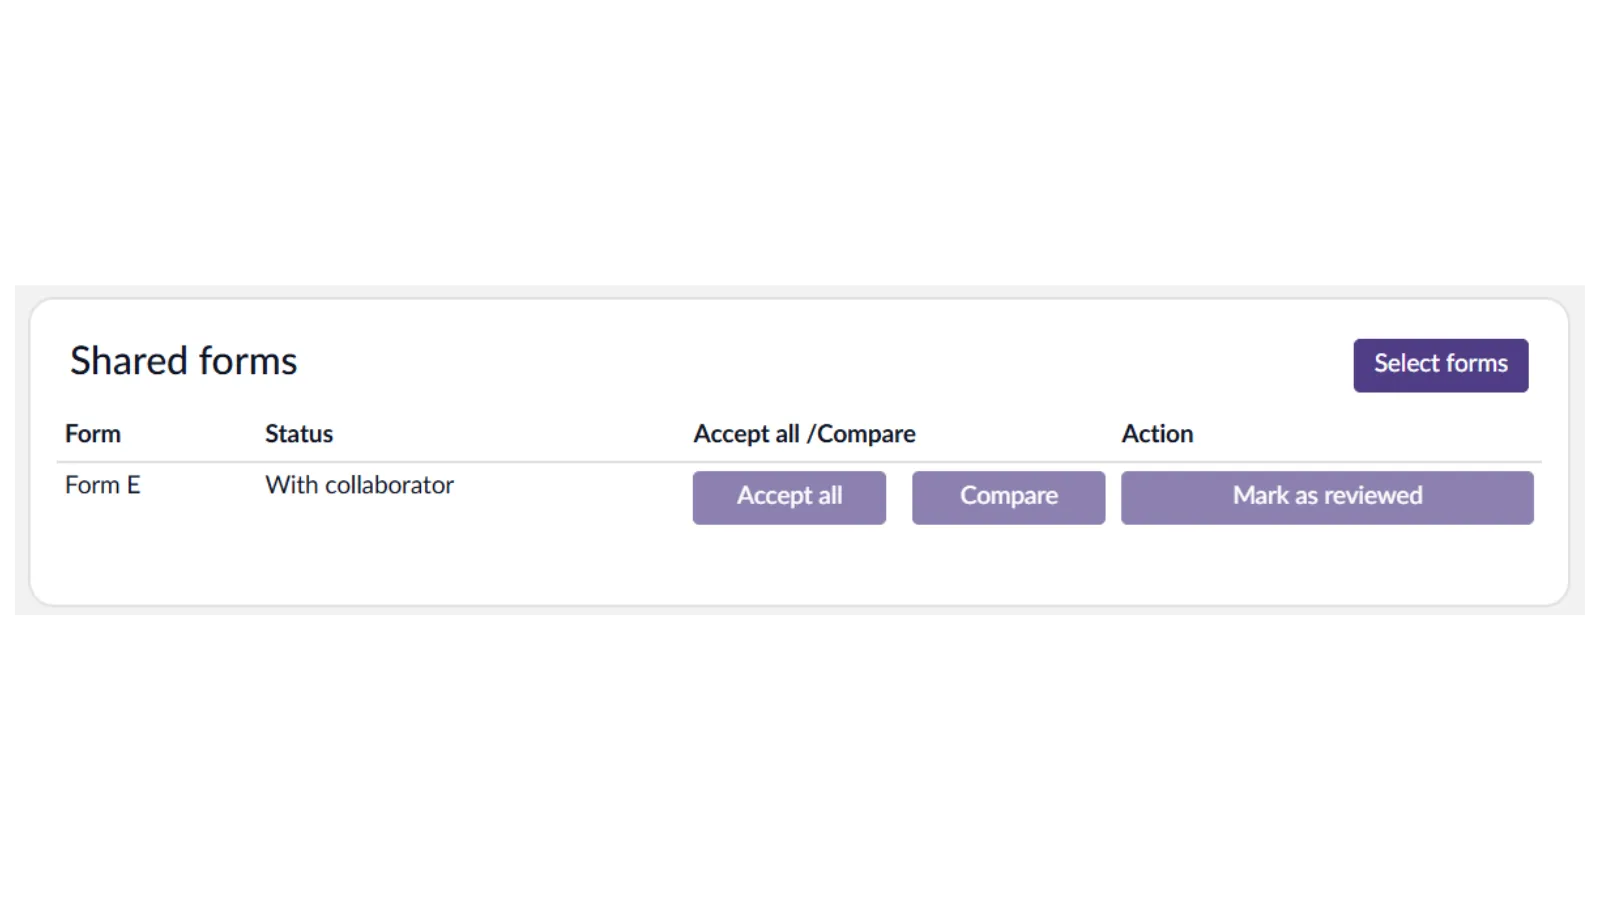
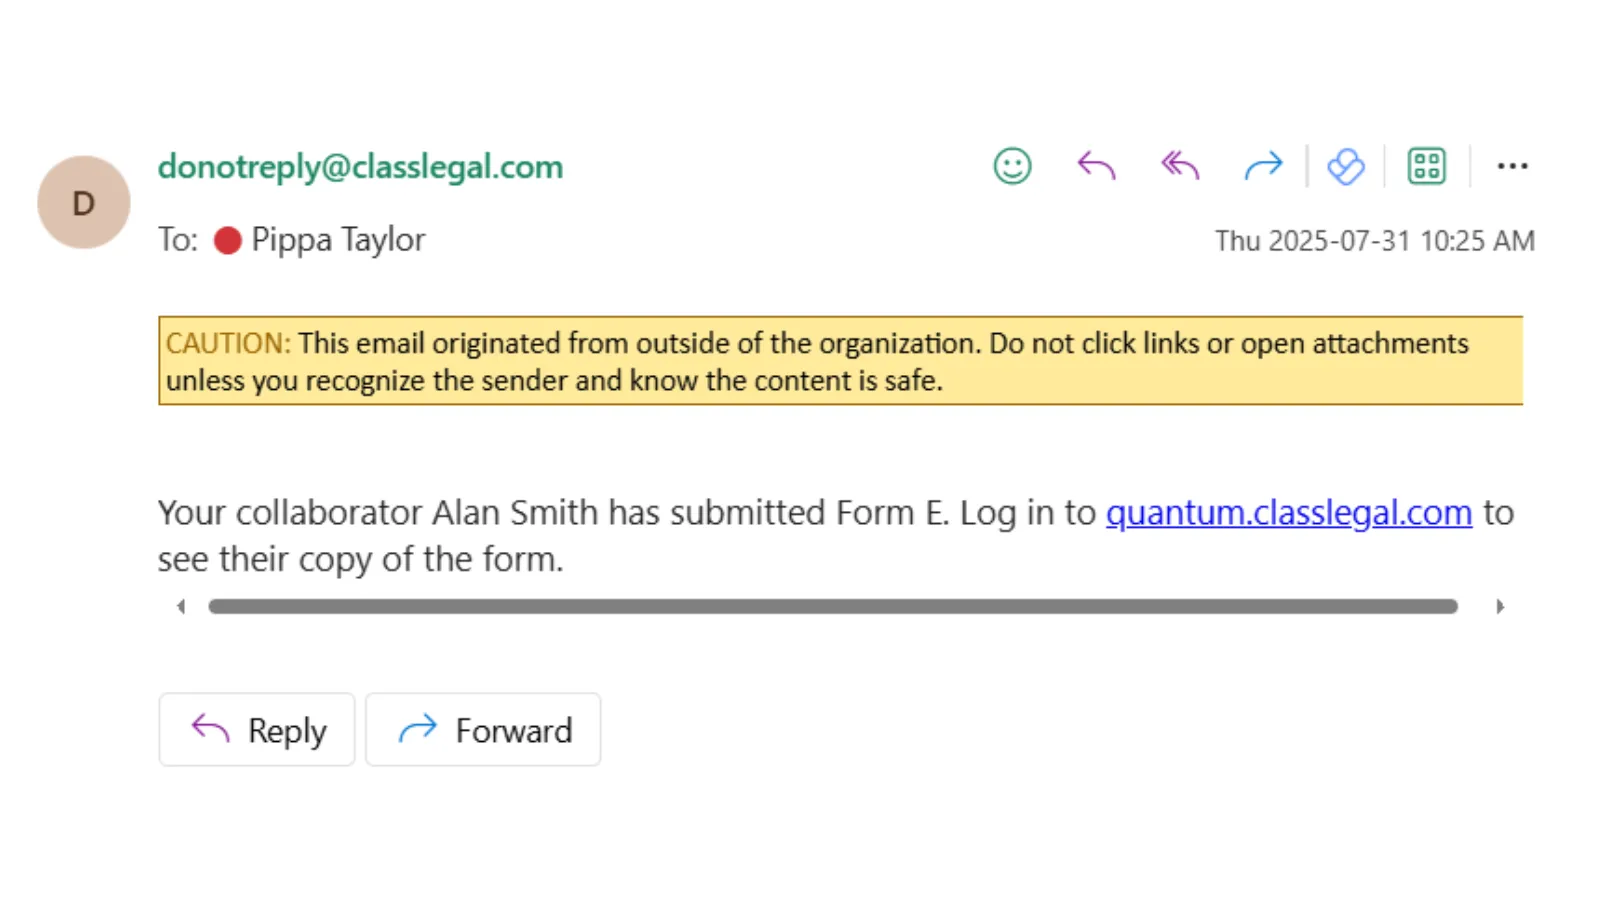
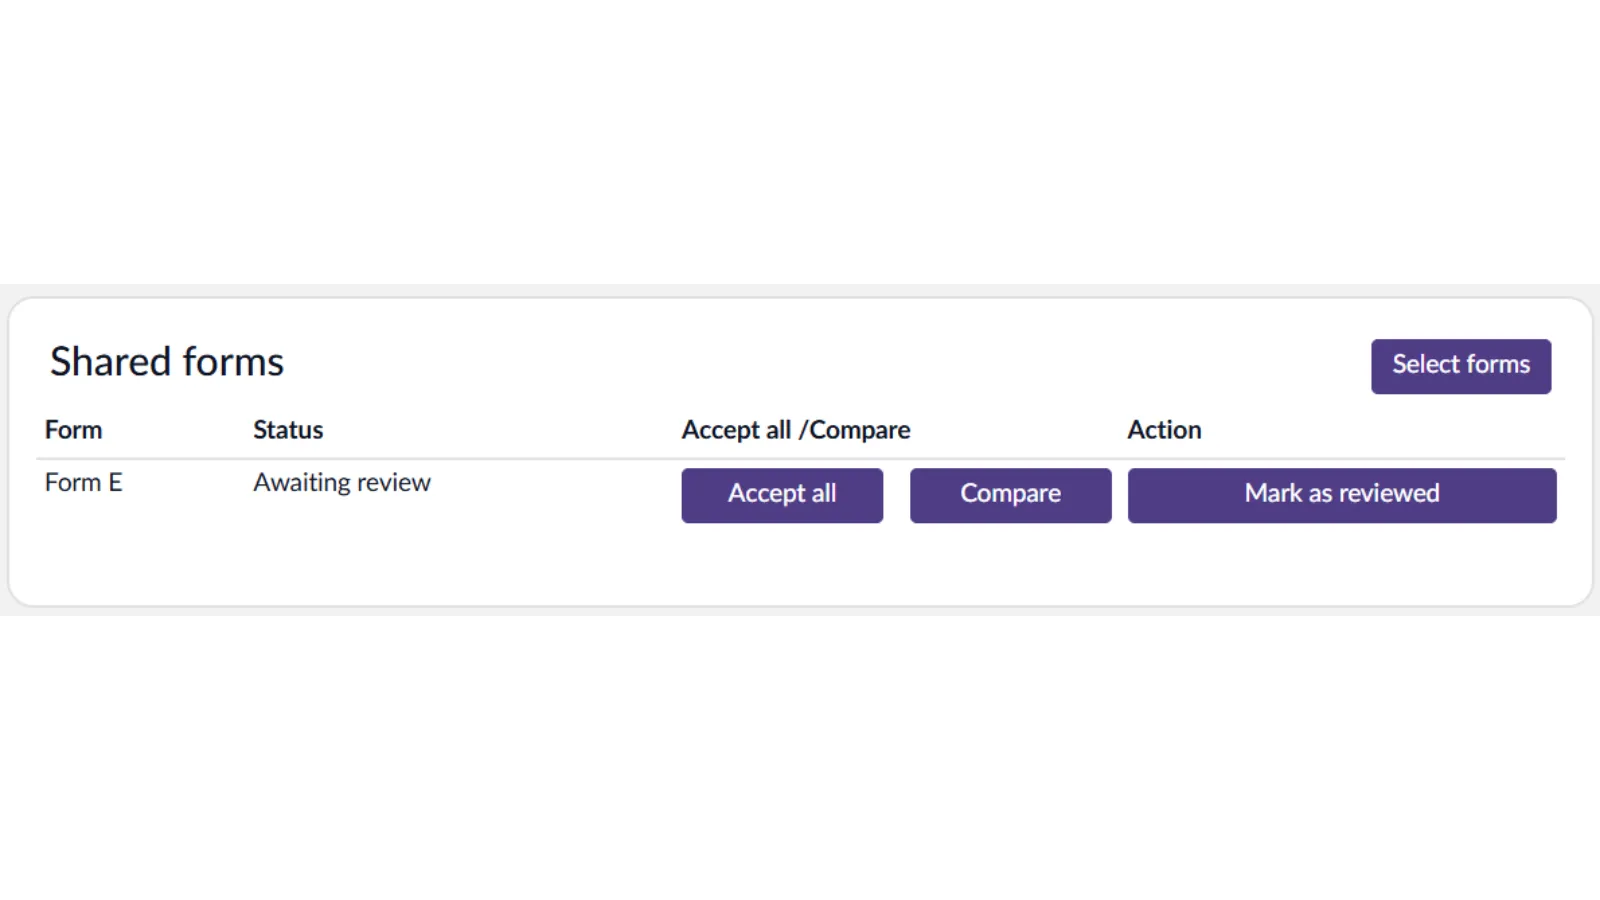
Once your collaborator has returned a form, you will recieve an email letting you know it is ready for review.
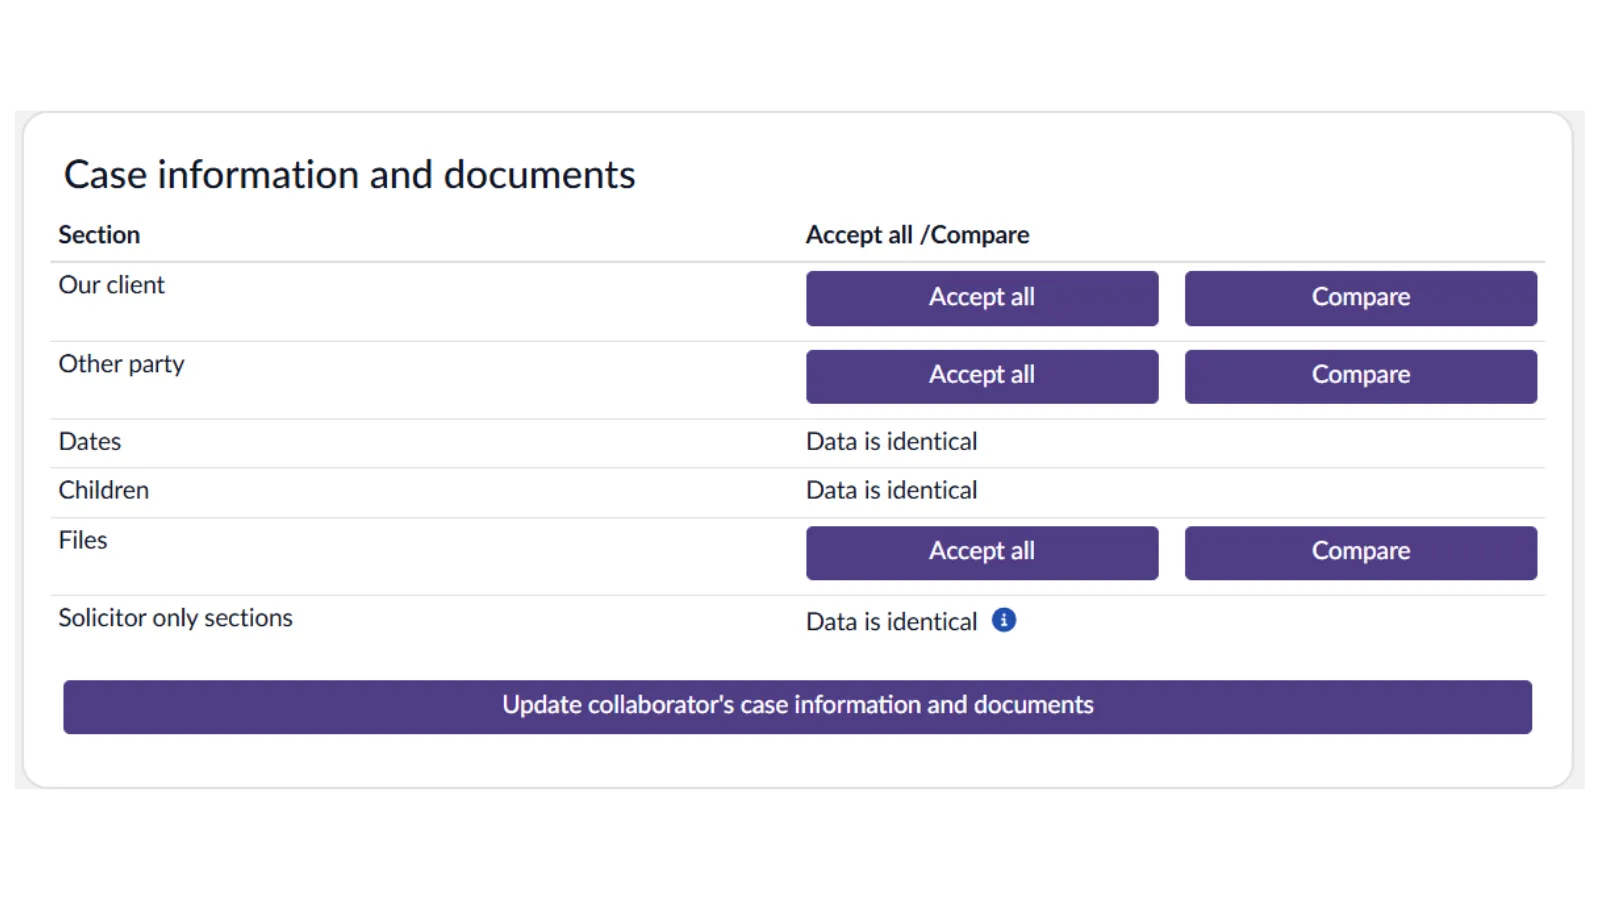
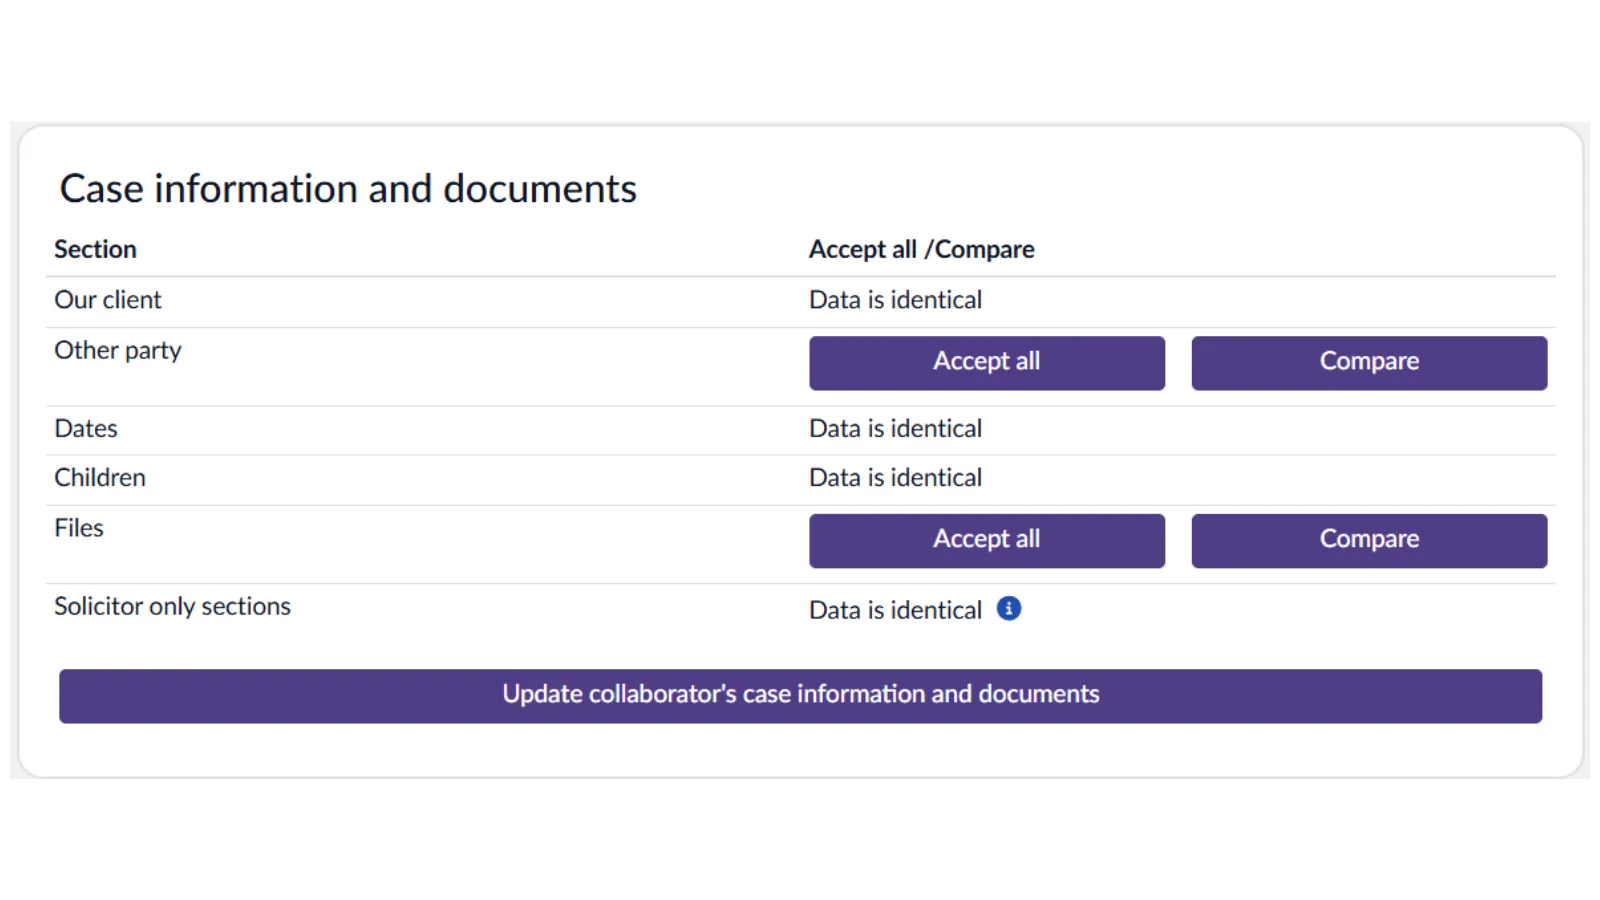
Before you can access the form, you first need to ensure that all of the case infomation is identical, as this is the information that auto-populates into the forms and documents that you create.
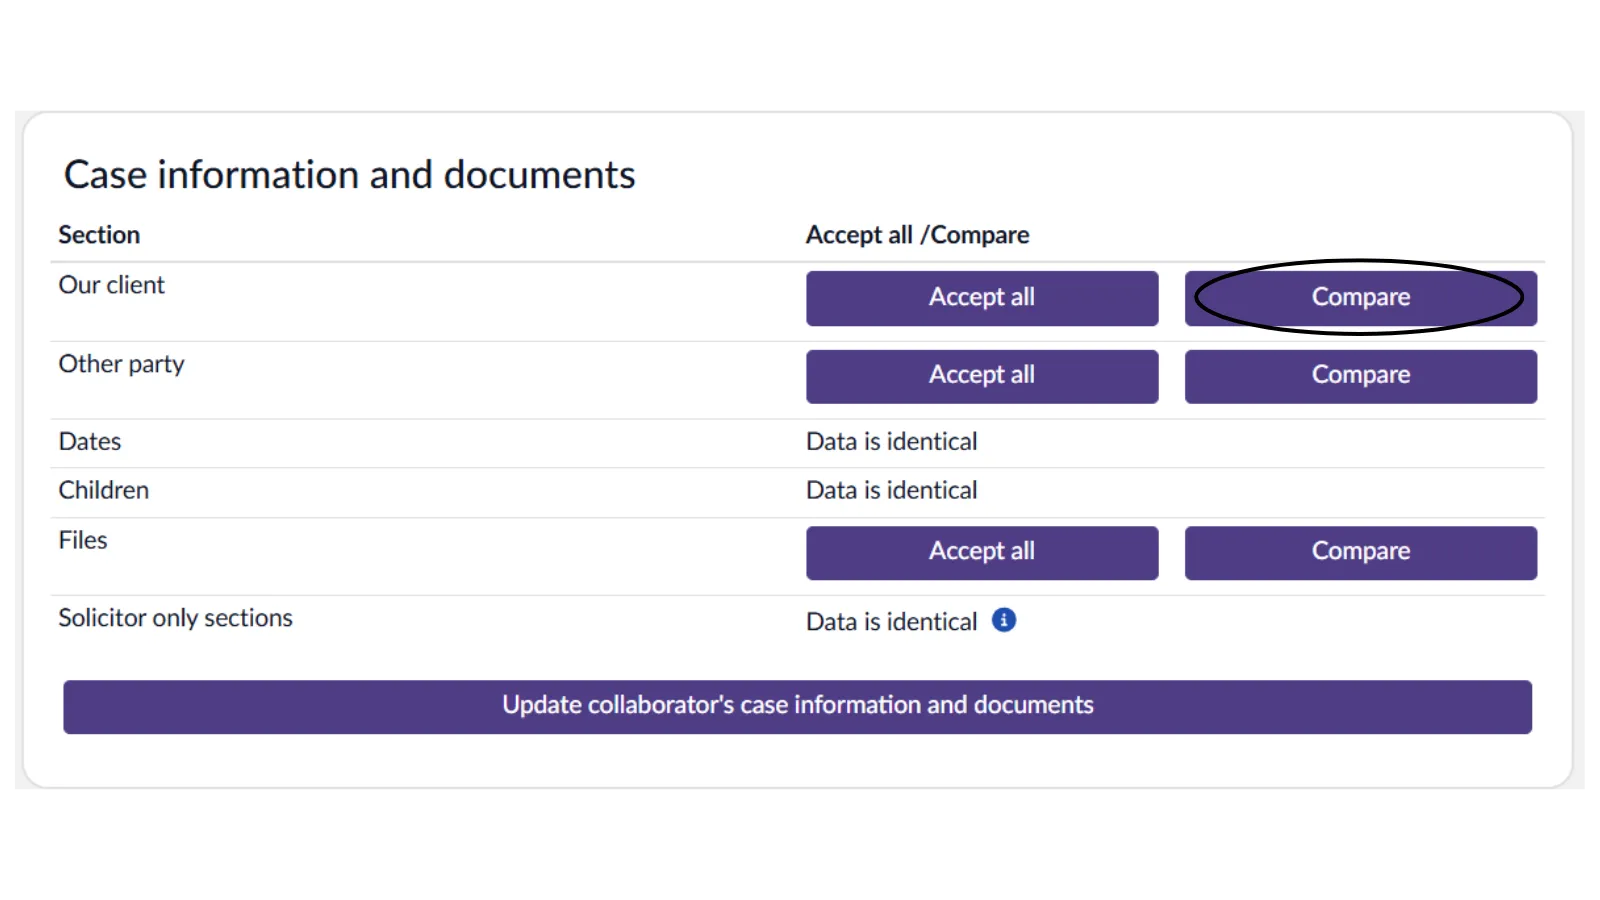
You can see from the screenshot above that changes have been made to the ‘Our client’, ‘Other party’, and ‘Files’ section. You can accept all the changes without looking at them by clicking ‘Accept all’, we would recommend looking at the changes the client has made by clicking ‘Compare’.
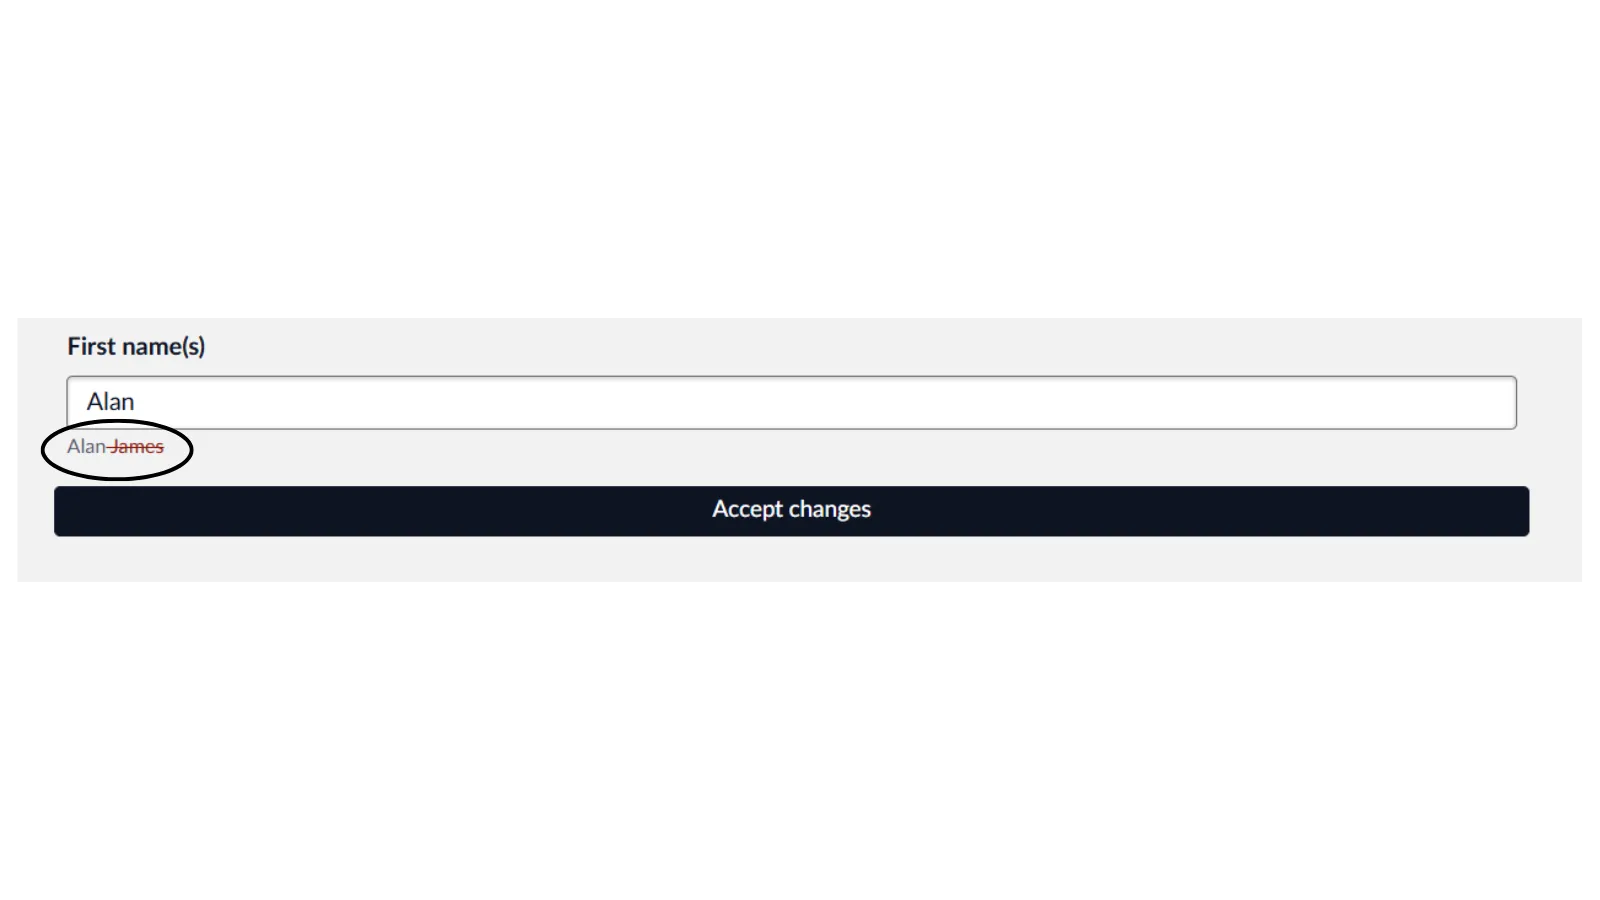
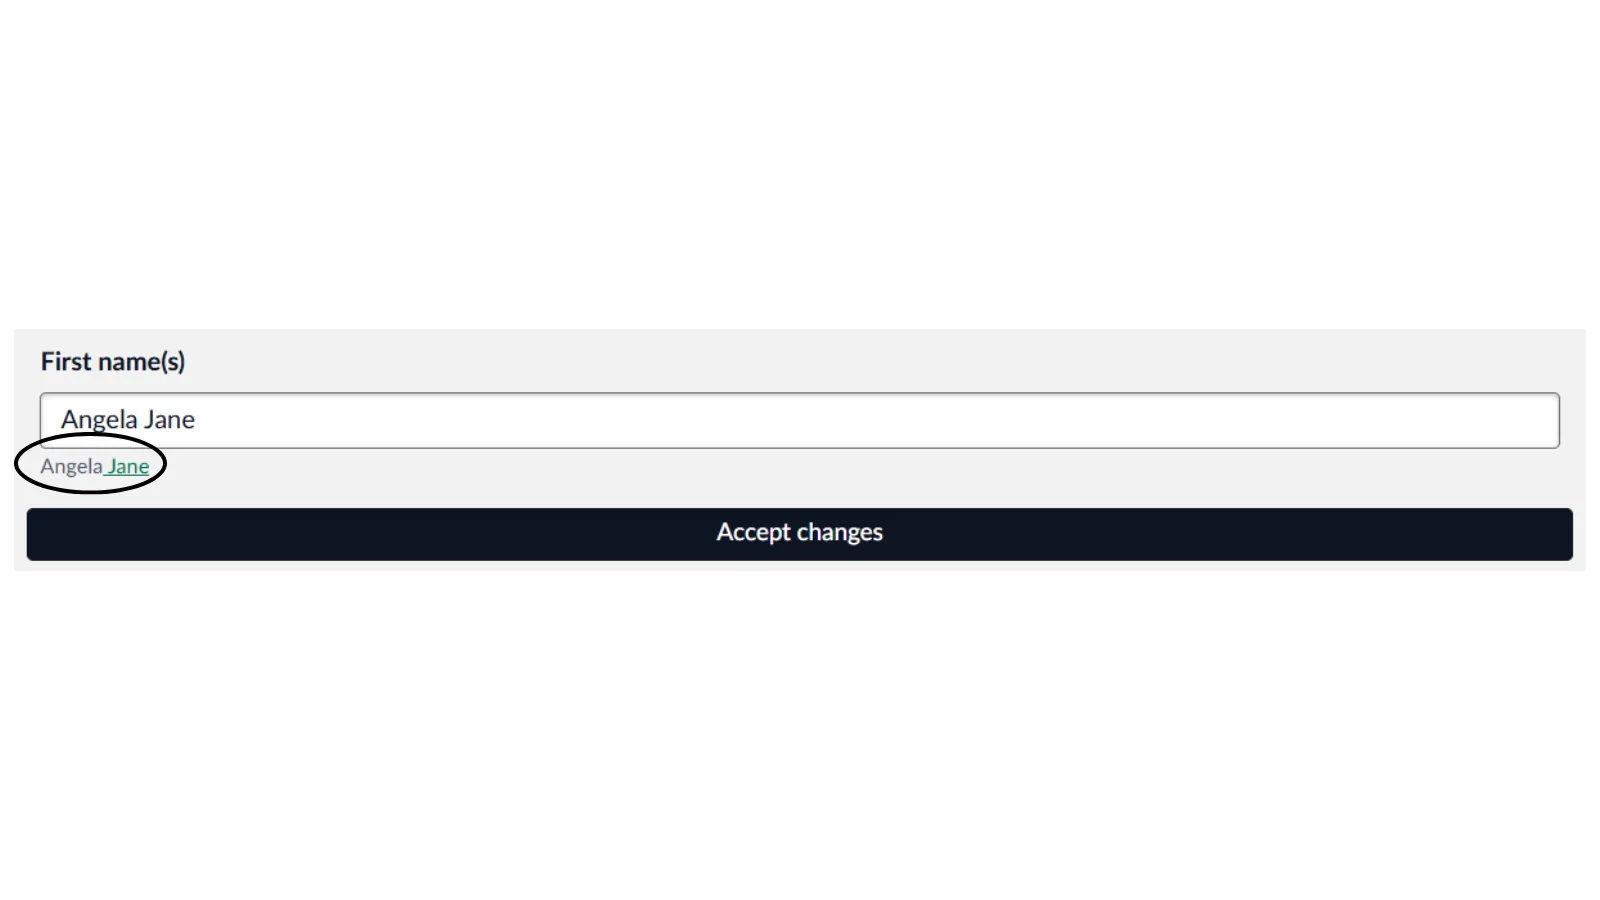
Changes will be shown in either green or red - green indicates that information has been added and red indicates that information has been removed. Here we can see that the client has removed their midde name from the case as it is highighted in red.
You can accept this change by clicking the ‘Accept changes’ button, or if you want to remove the client’s changes, simply navigate back to the collaborate dashboard. For the purpose of this guide, we will accept the client’s changes.
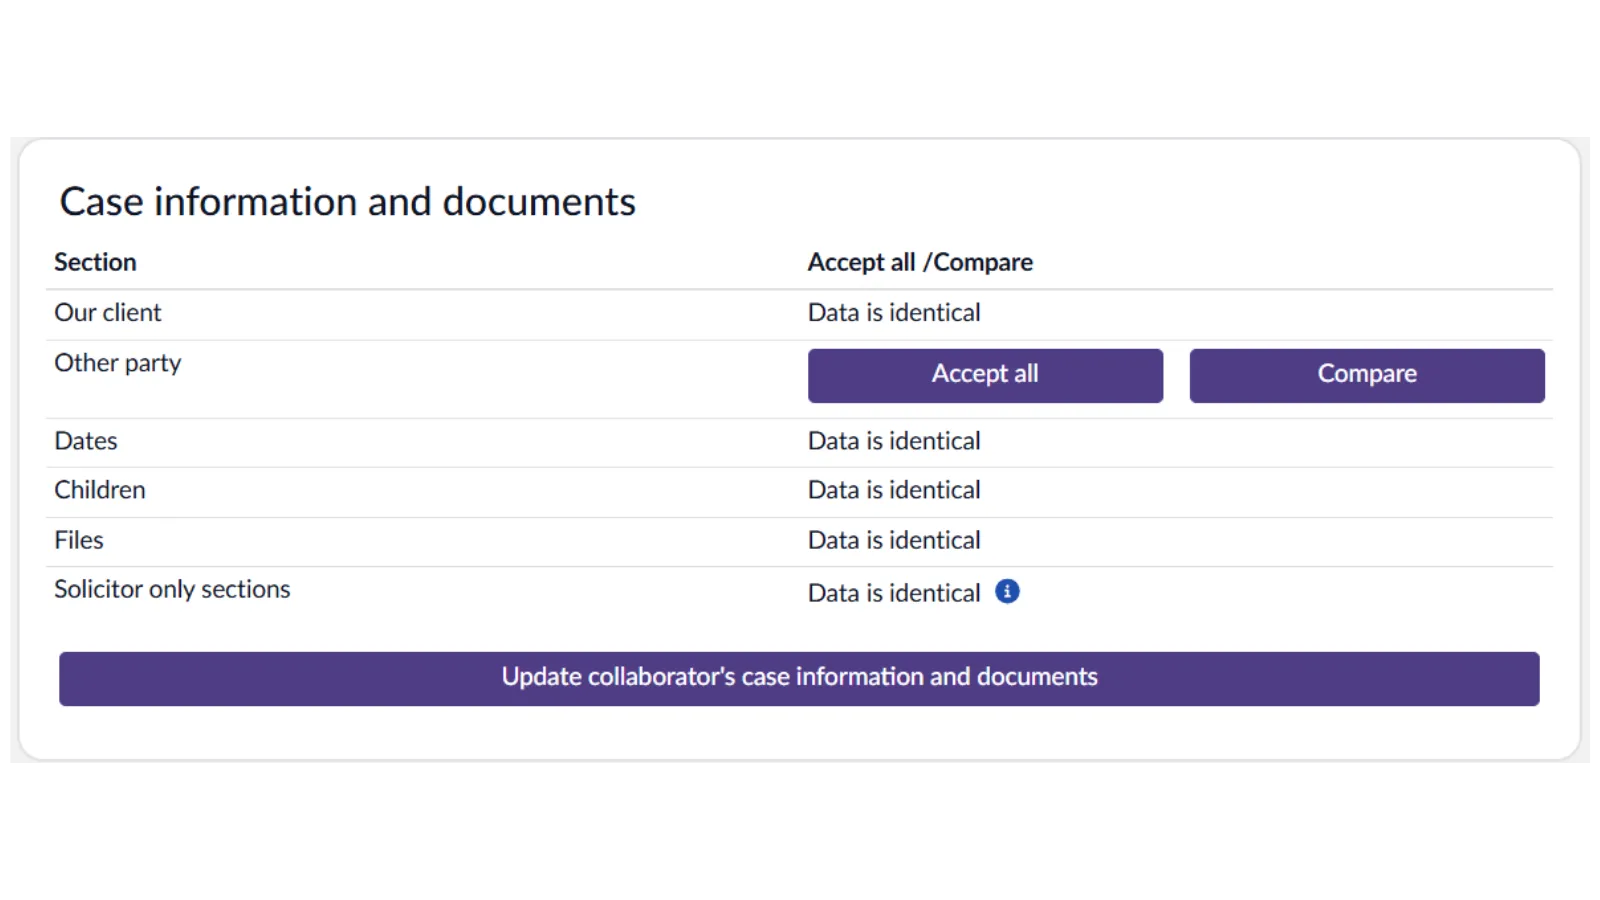
Once the change has been accepted, you can see the case information shows that the ‘Our client’ section has identical data. You can then move on to the next sections of your case information and repeat the process.
We can see that there is a change to the ‘Other party’ section of the Case infromation, so we will click compare to see the changes. We can see the client has add the other partie’s middle name as the change is in green.
You can accept this change by clicking the ‘Accept changes’ button, or if you want to remove the client’s changes, simply navigate back to the collaborate dashboard. For the purpose of this guide, we will remove these changes, and so simply navigate back to the collaborate dashboard.
As we have not accepted this change, we can see the difference still highlighted in the ‘Other party’ section. You can then move on to the next sections of your case information and repeat this process.
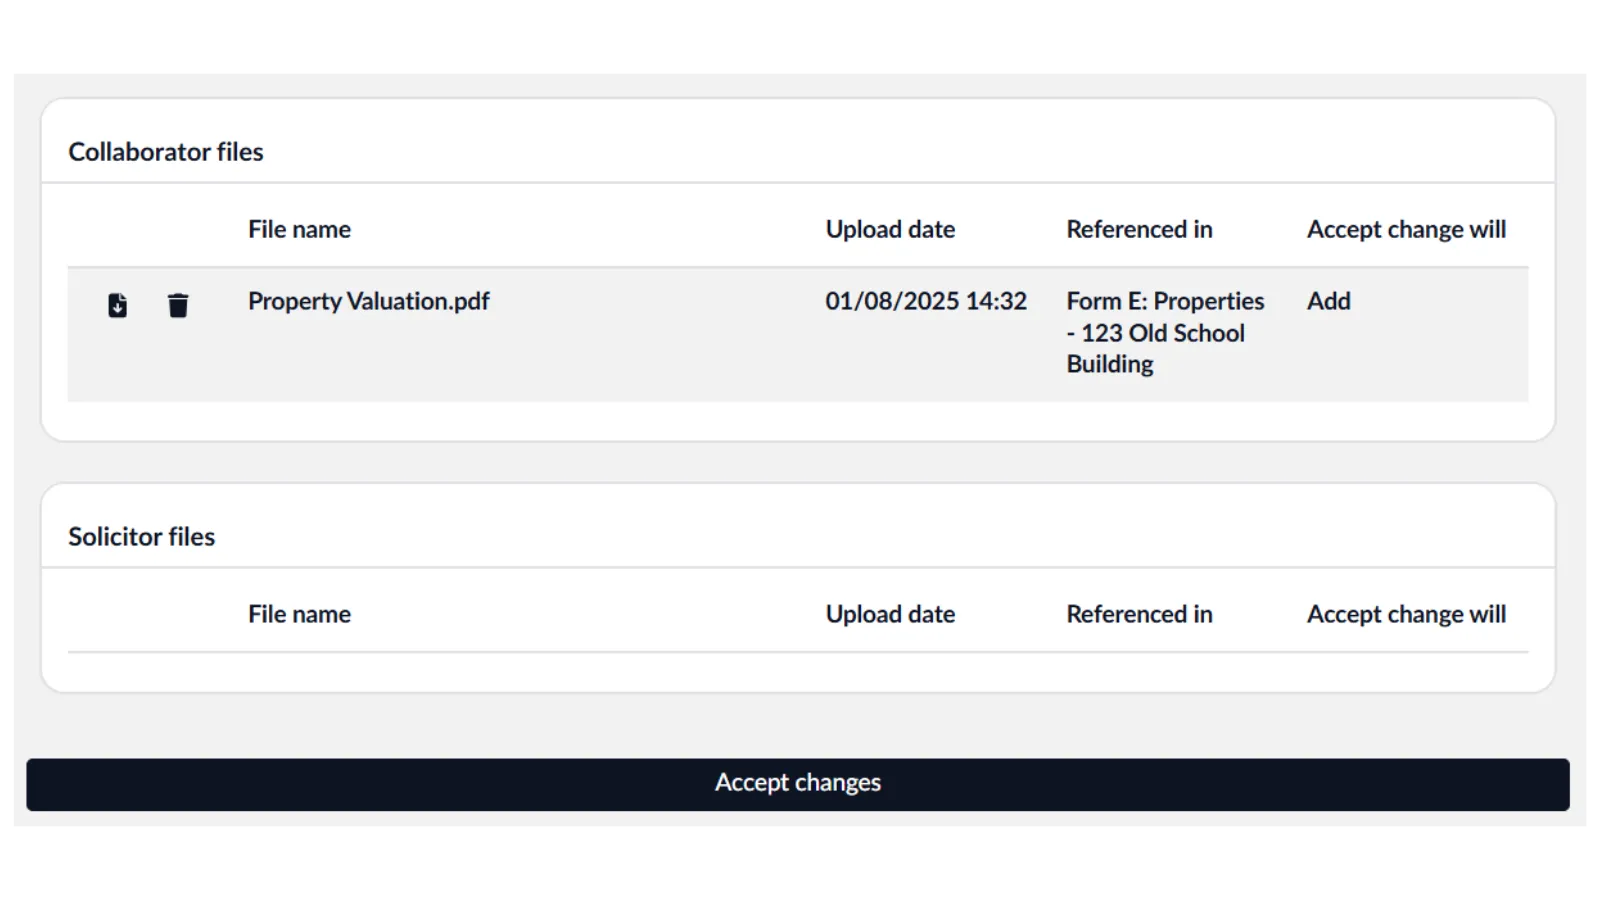
If your client has uploaded any documens to their case they will appear in the ‘Files’ section of the case information. You can either click ‘Accept all’ to pull through all of the documents, or click ‘Compare’ to see details.
If you client has uploaded any PDF documents to their case they will appear in the ‘Files’ section of the ‘Case information’. If we click compare we can see that the client has added a property valuation.
You can accept this change by clicking the ‘Accept changes’ button, or if you want to remove the client’s changes, simply navigate back to the collaborate dashboard. For the purpose of this guide, we will accept this document.
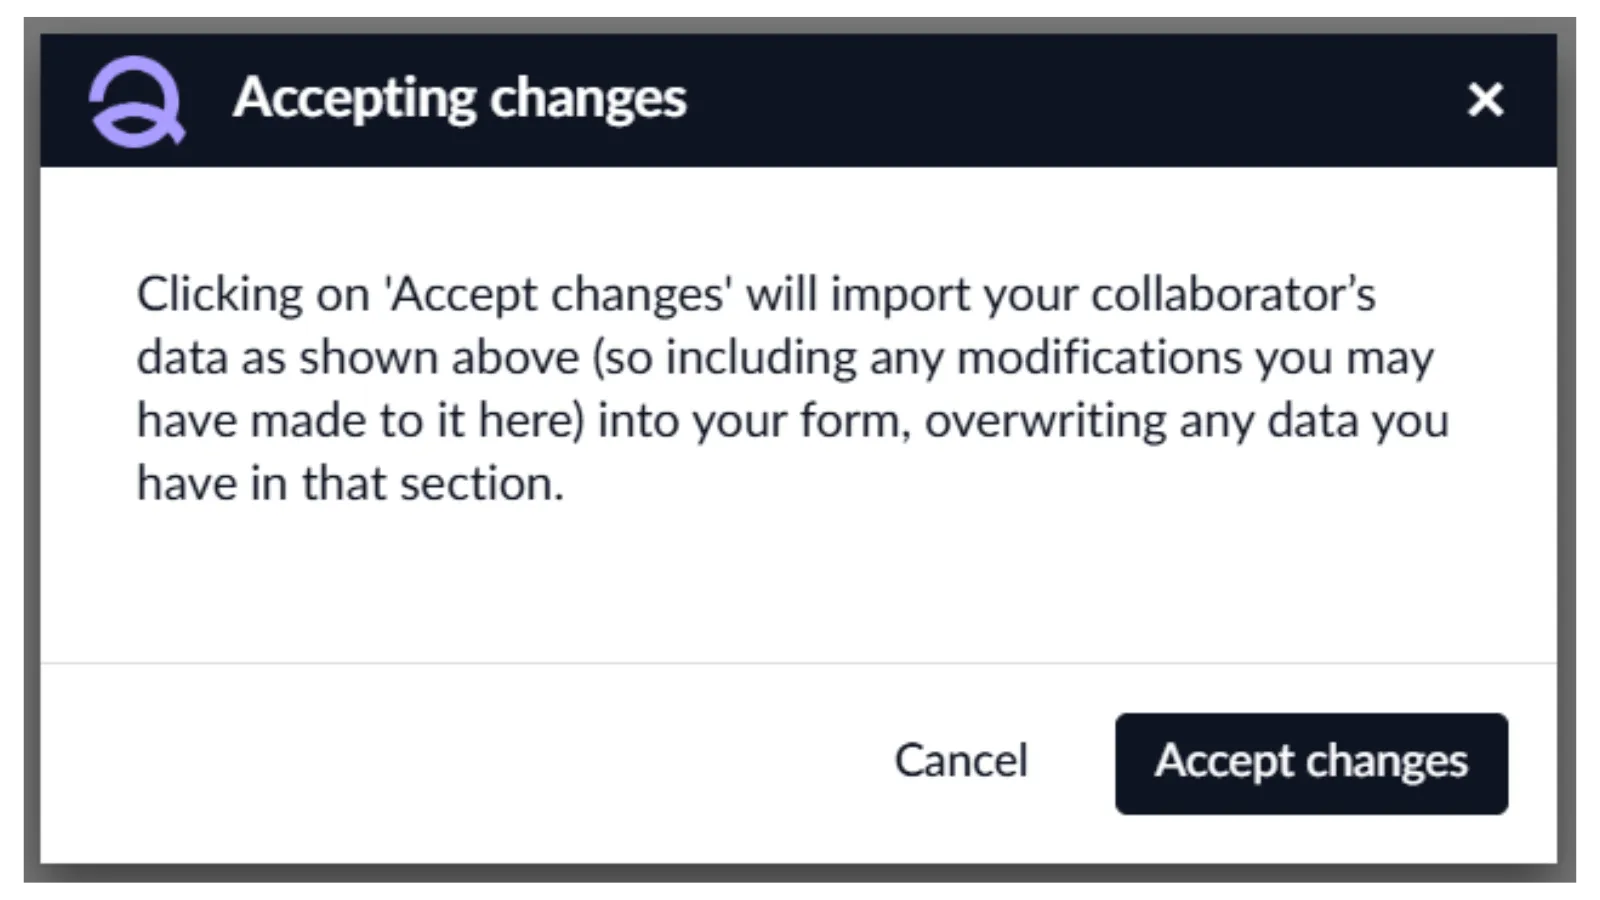
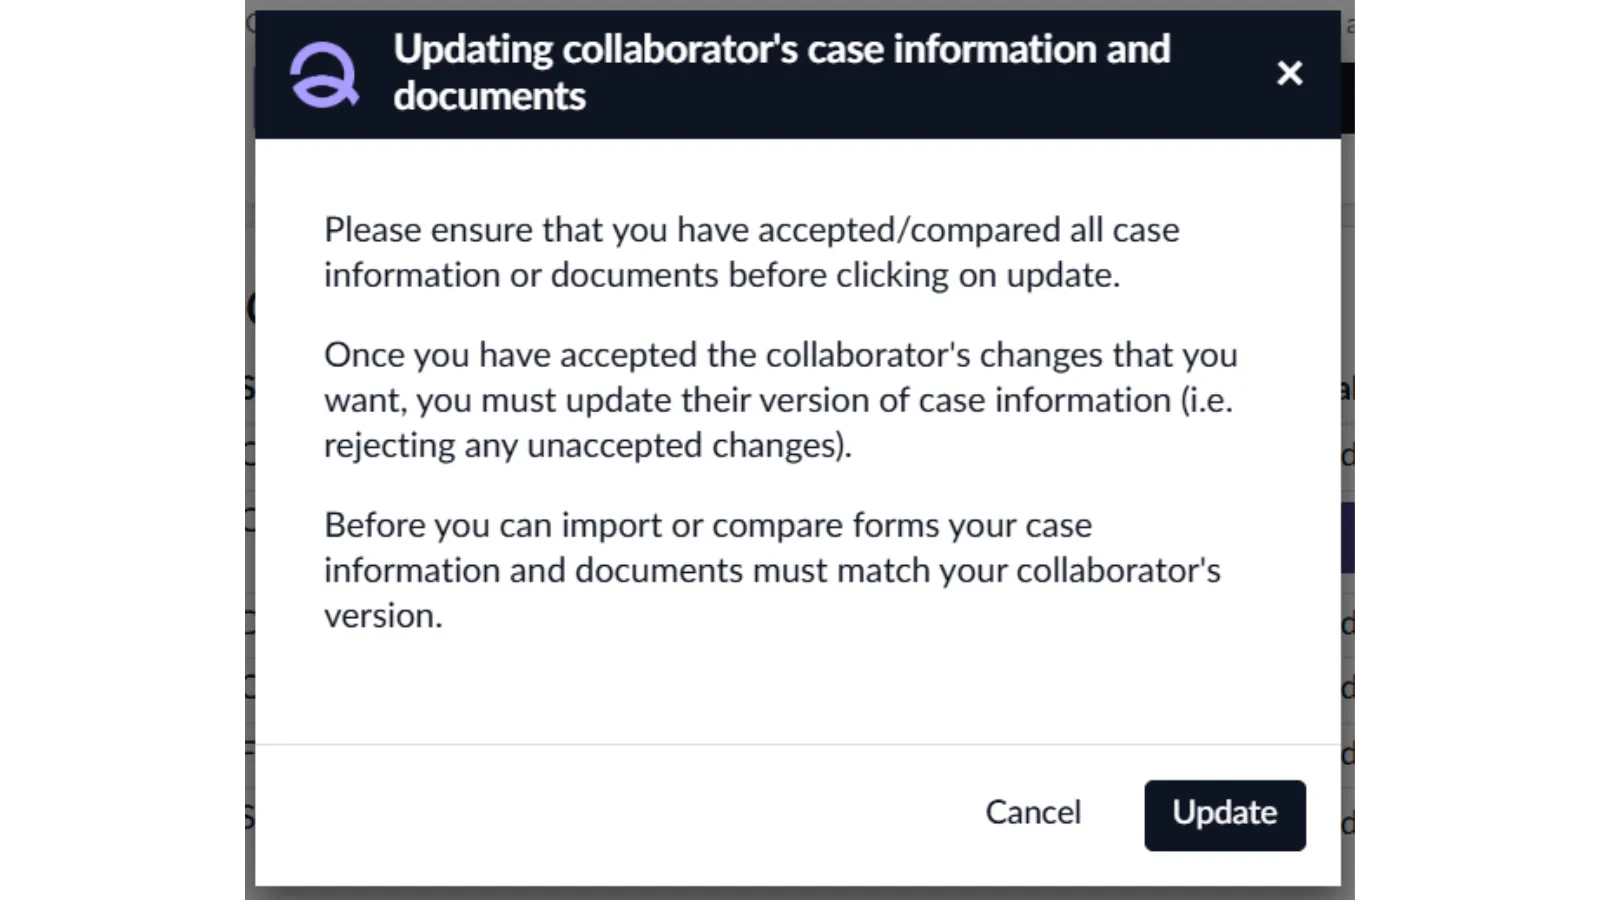
Now that the changes we want have been accepted, and anything you don’t want saving has been ignored, you can click ‘Update collaborators case information and details’ - this will pull through the changes you accepted into your Case information and remove any changes you ignored. Once this is done, you will be able to review the form.
Please note that any changes not accepted will be removed upon clicking ‘Update collaborators case information and details’ so please ensure you thoroughly review the case information.
Reviewing collaborator changes - Forms
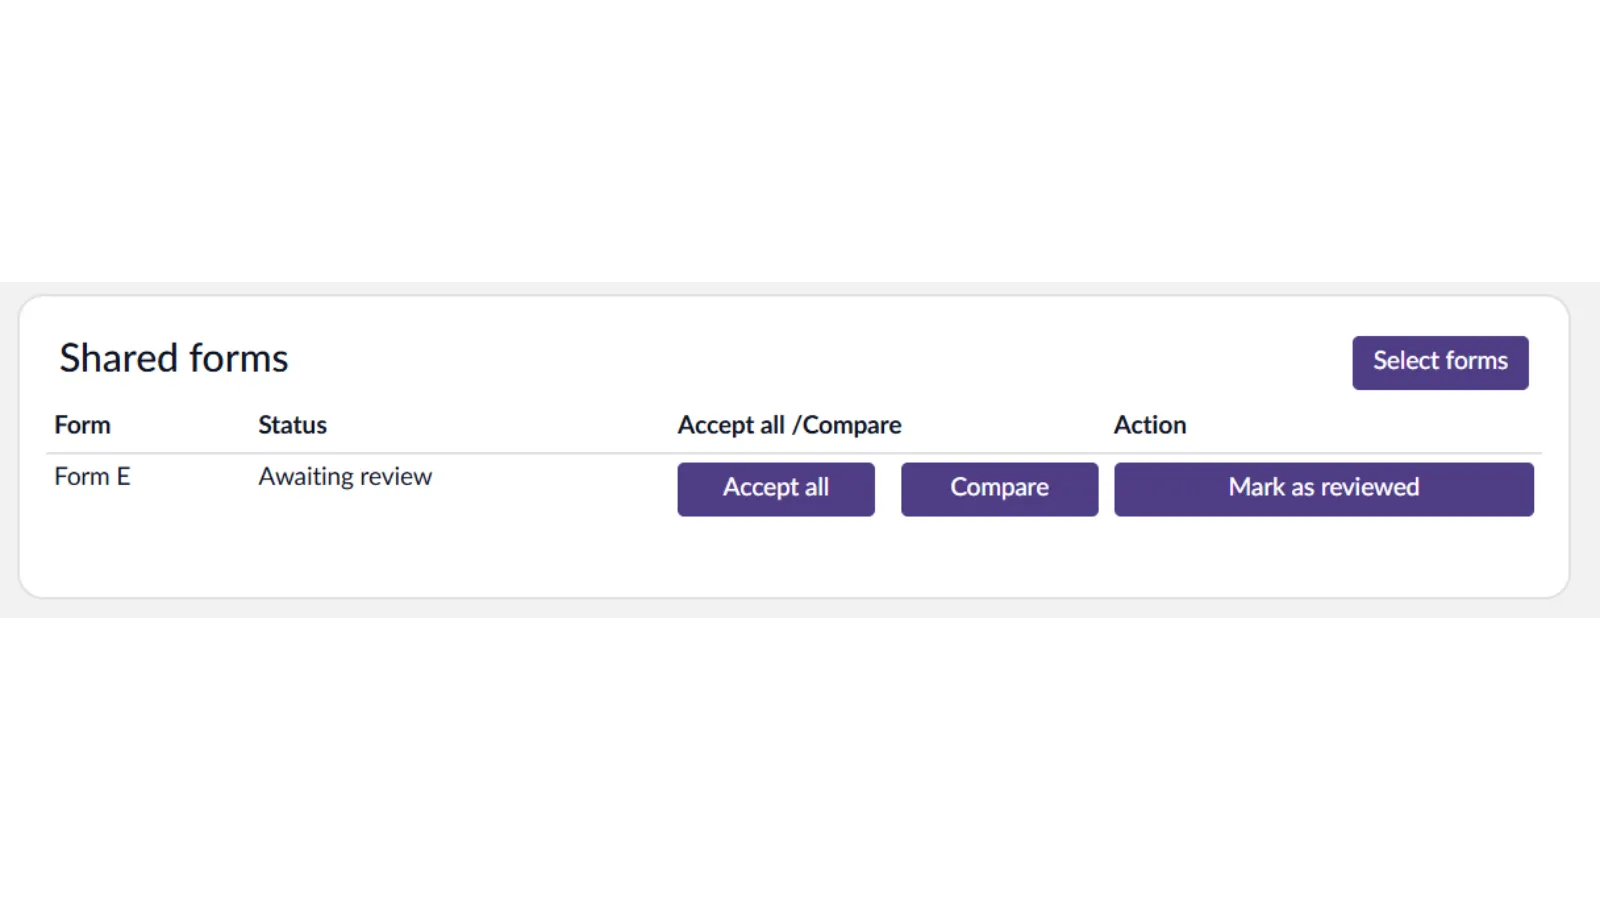
Now that the case information is identical, we can access the form to review any changes. If you sent across a blank form, you may want to ‘Accept all’ changes, however we would recommend choosing ‘Compare’ to see the individual changes.
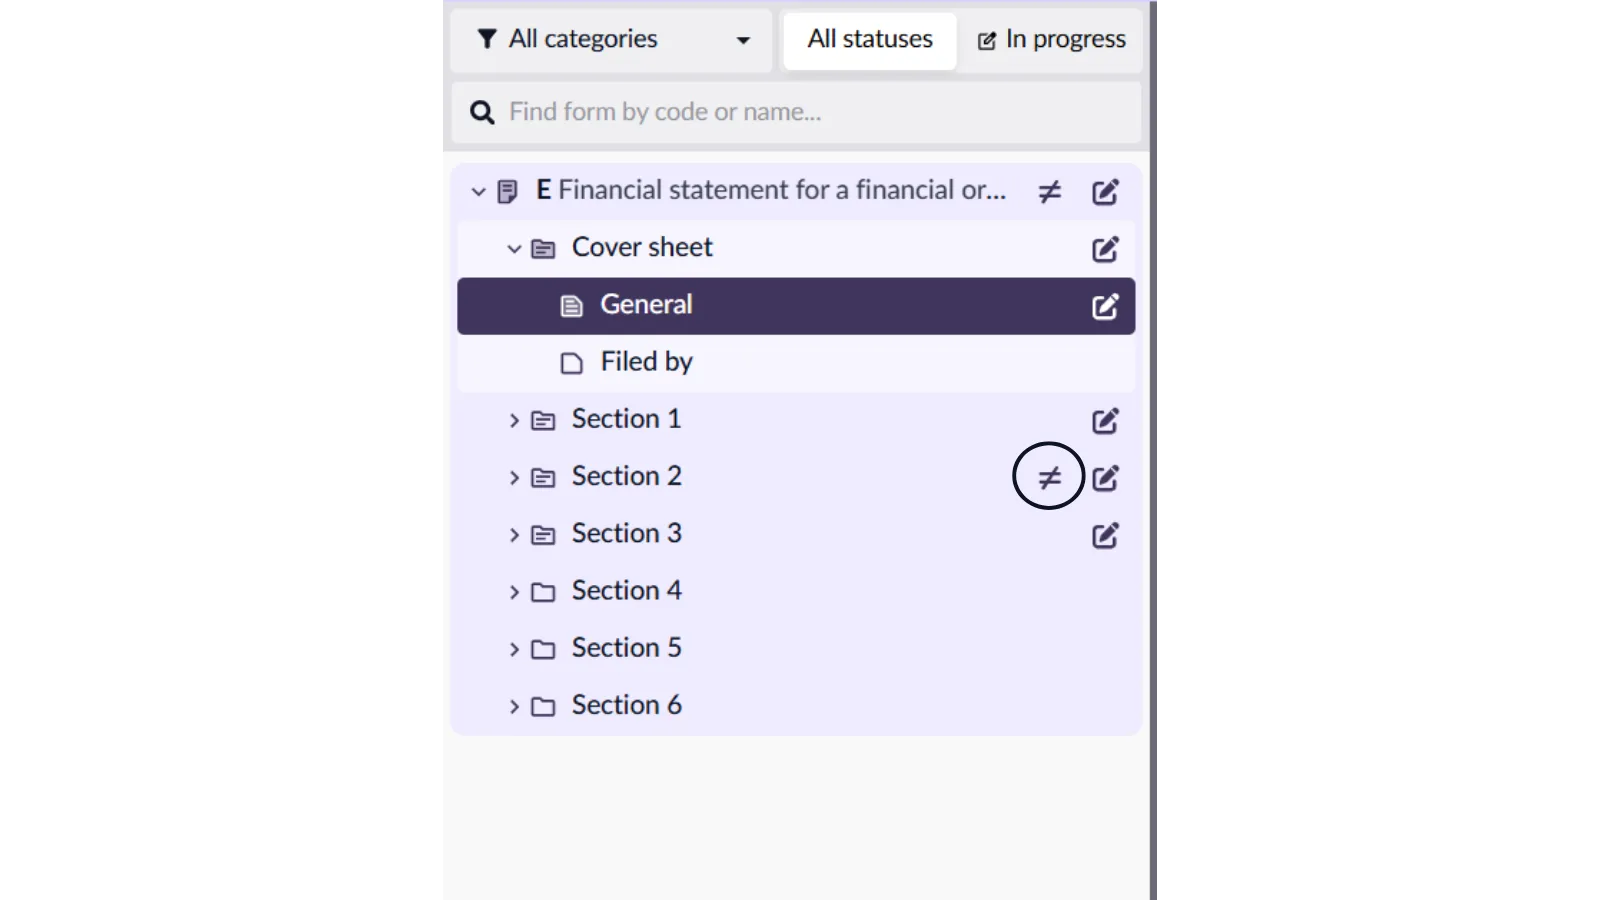
The sections of the form will open up on the left hand side of your screen. Any sections where the client has made changes will show this the track change icon.
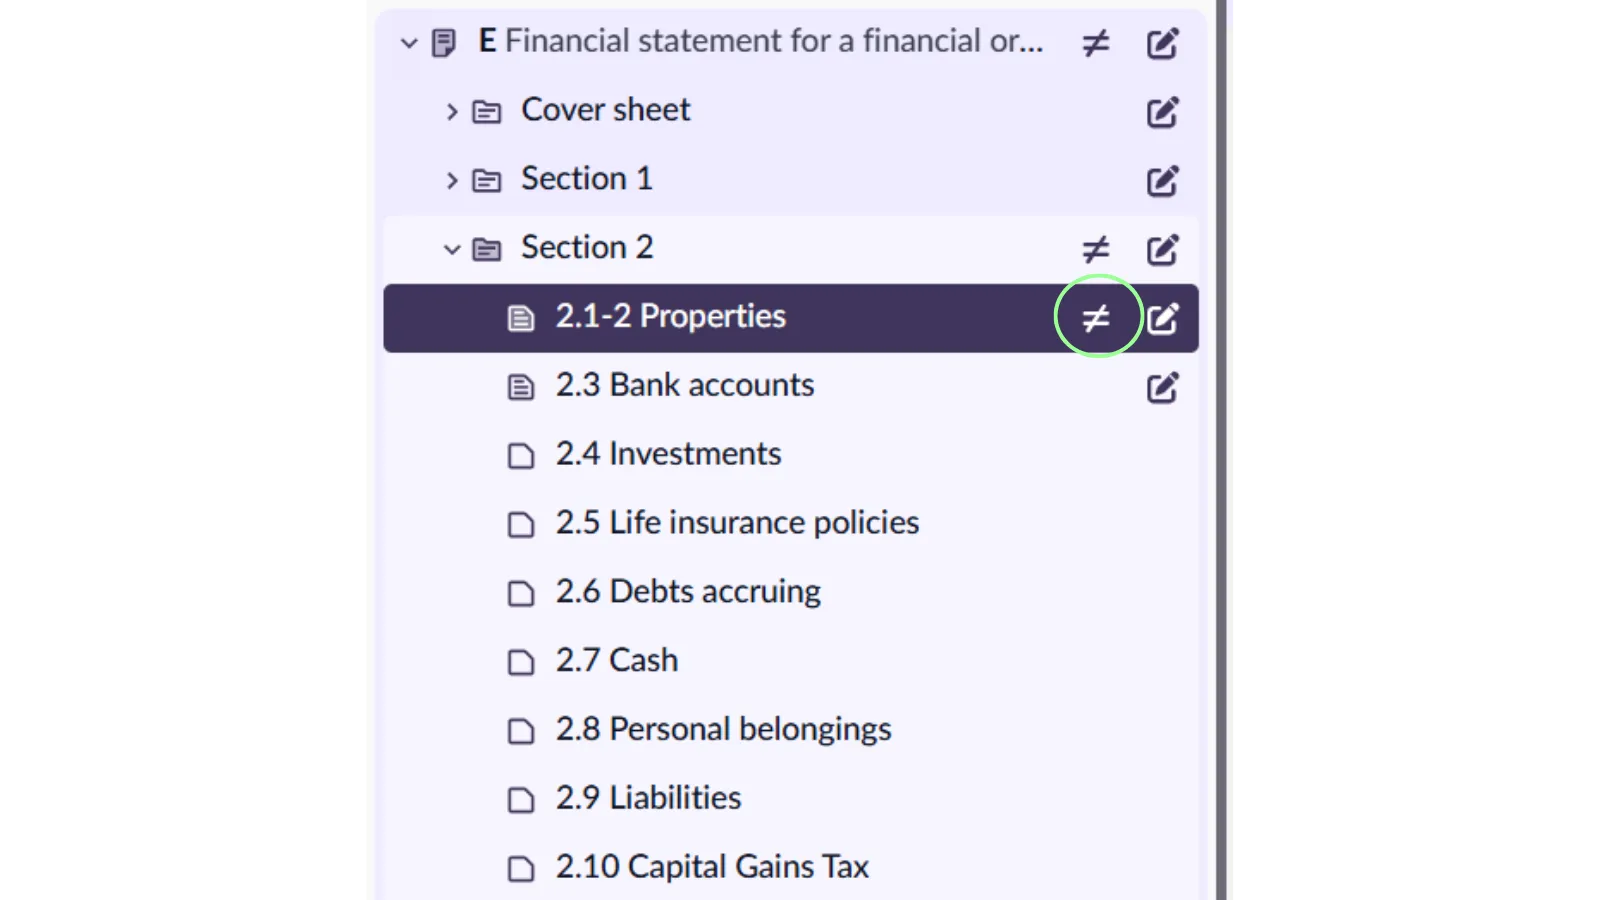
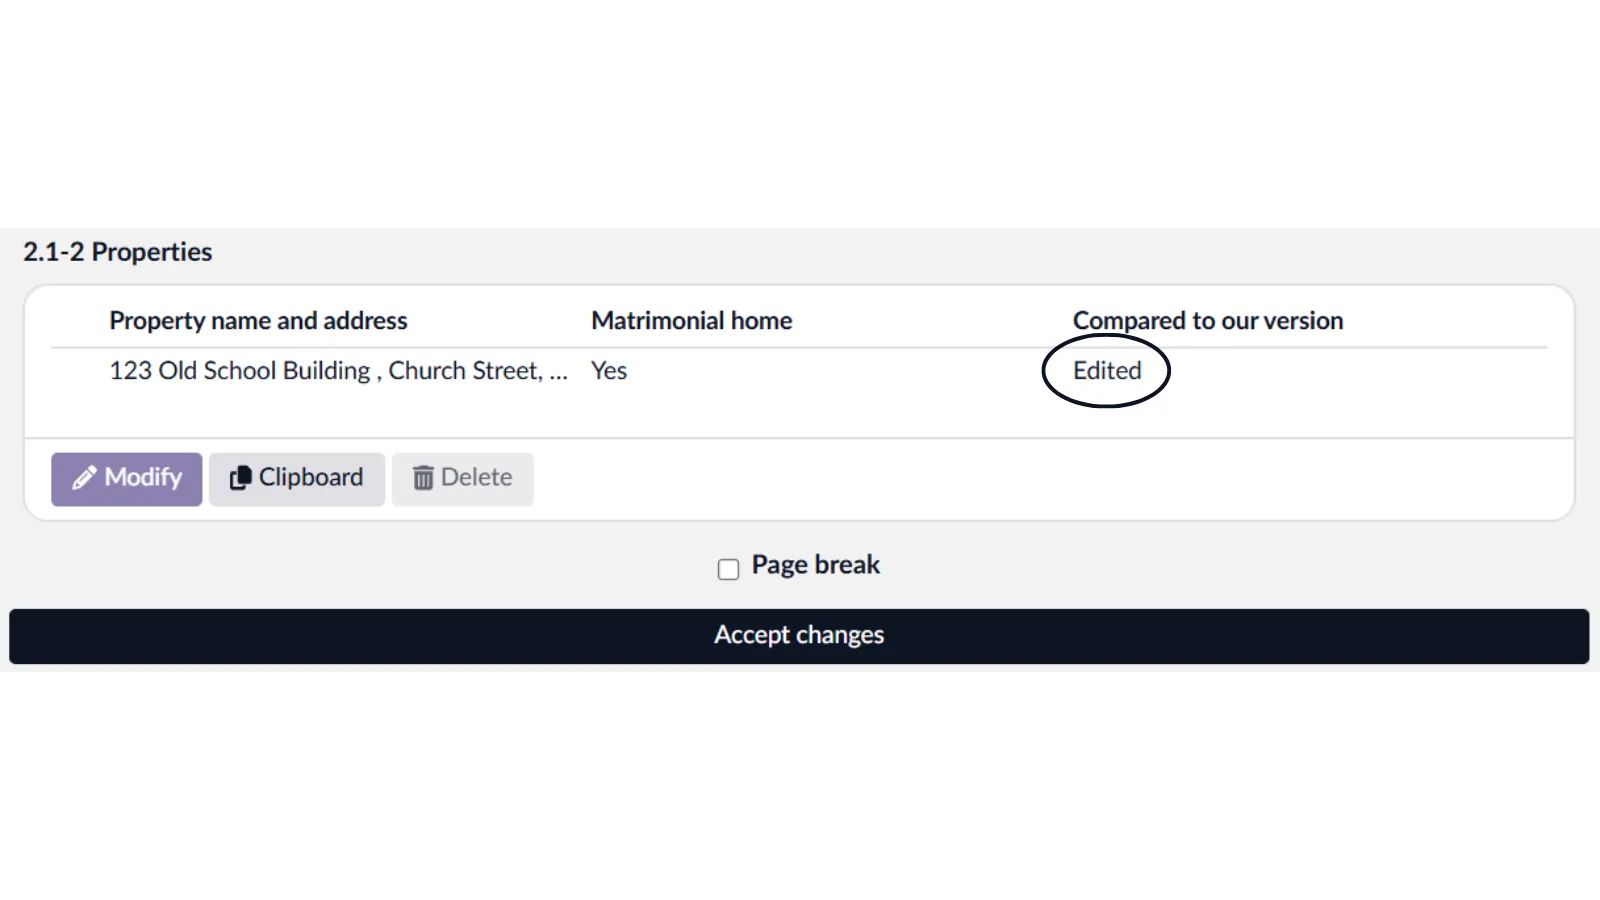
We can see from the icon that changes have been made in sections 2.1-2.2.
When sections are laid out in a table format, such as in properties and bank accounts, the changes are laid out in a different way. Each section within the table will show as either ‘Unchanged’, ‘Edited’, or ‘Added’.
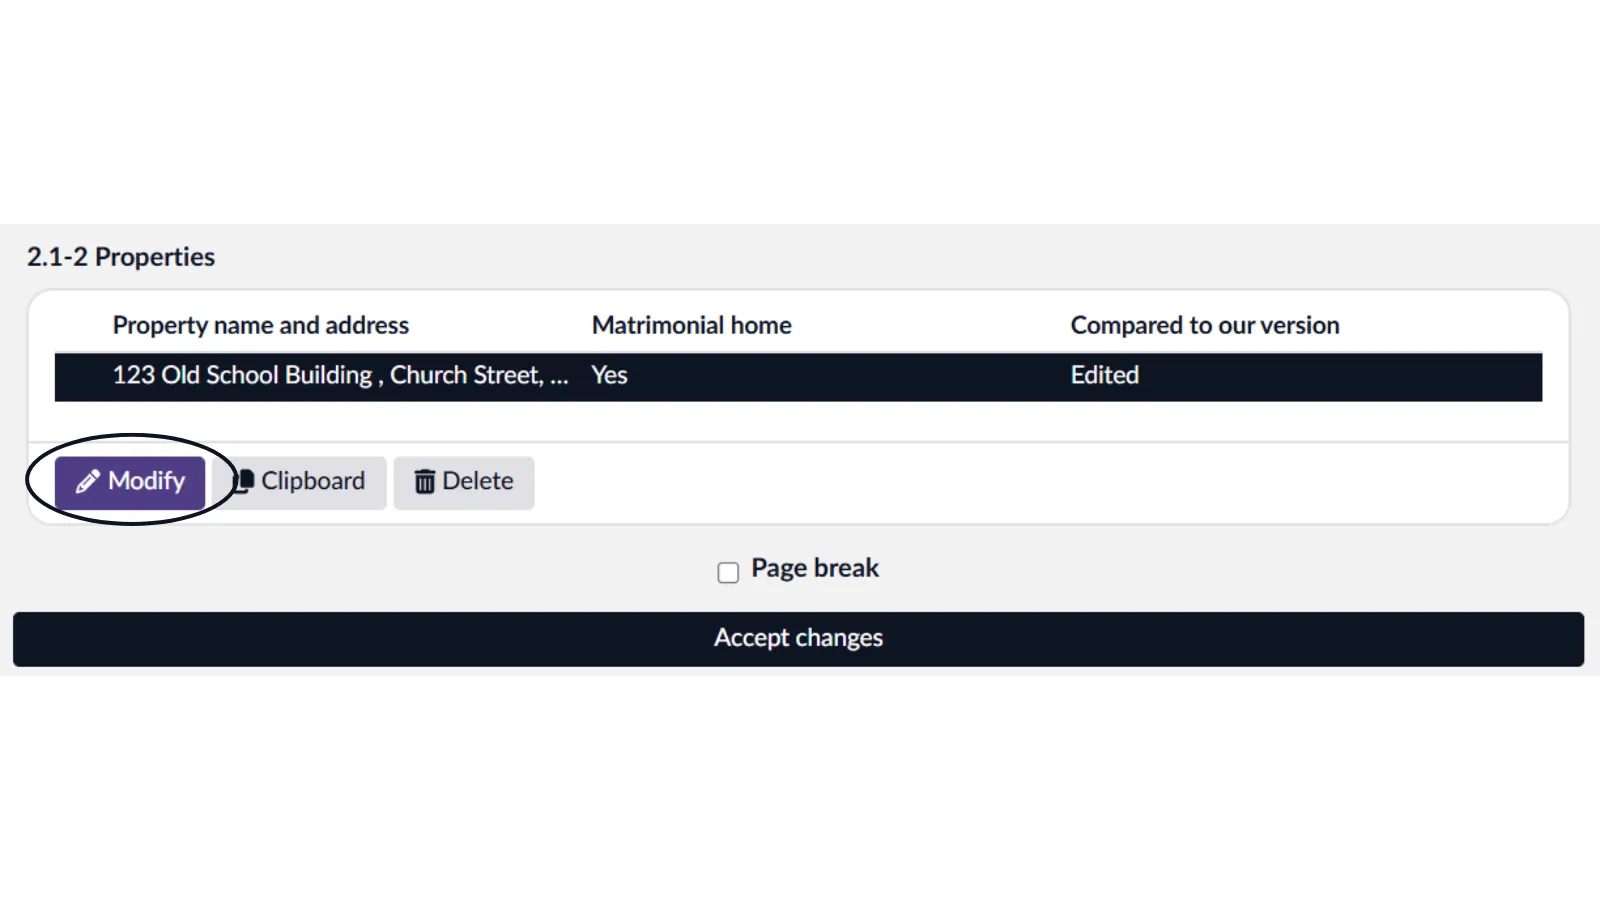
To look at the desired property, you need to select the property and then click ‘Modify’.
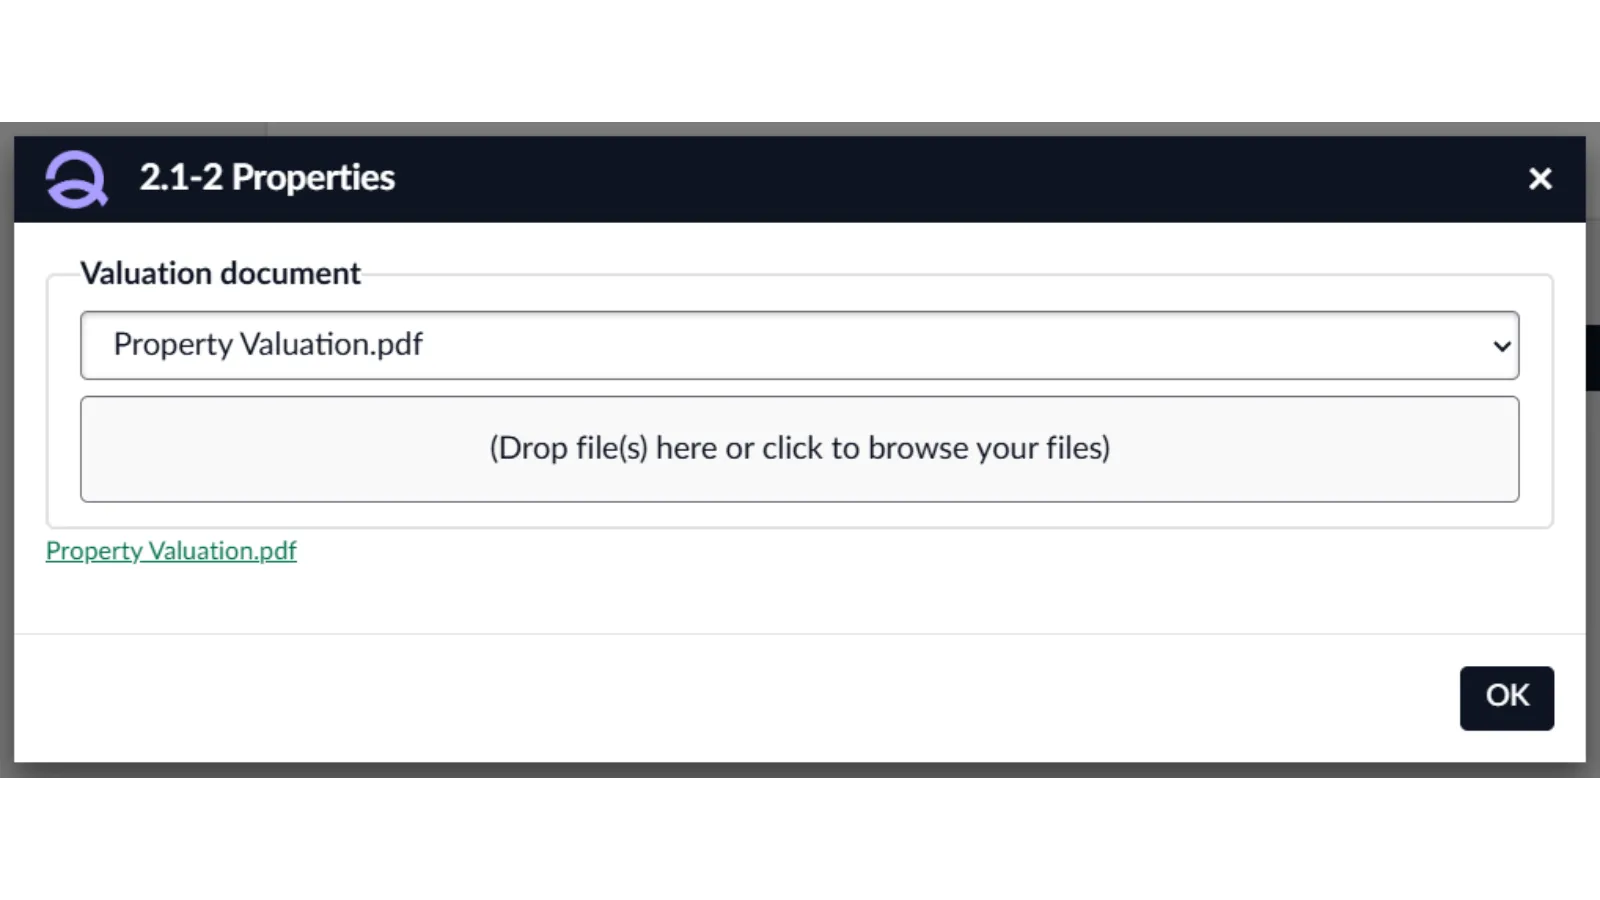
Any changes made will then pop up with the red or green text to indicate wheteher the information has been added or removed. Here we can see that the property valuation document was added.
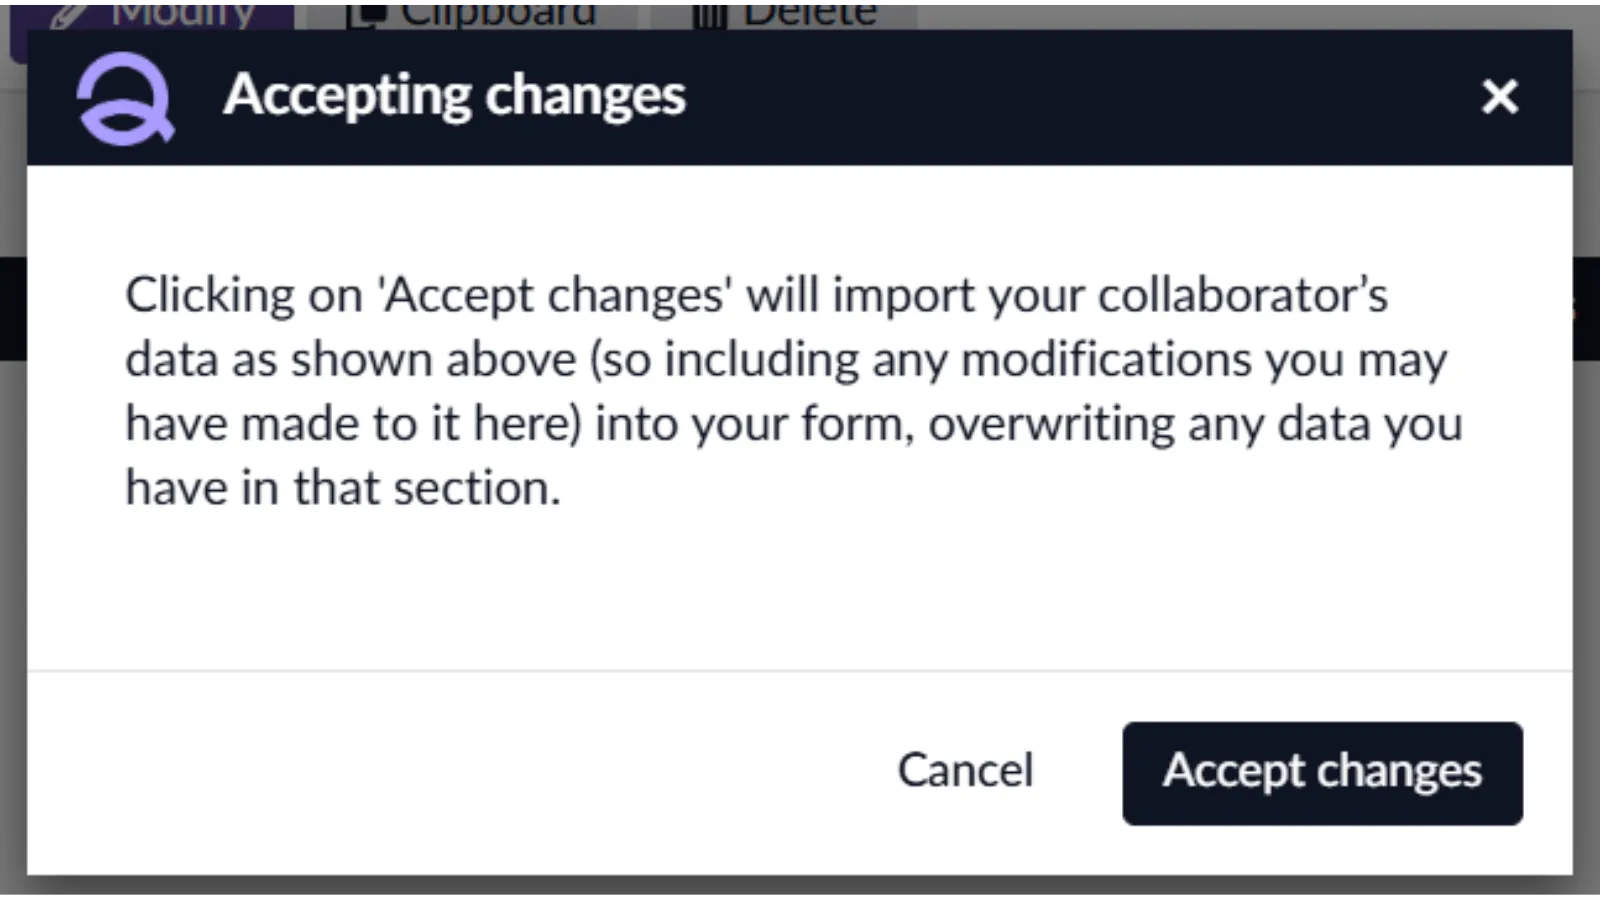
To accept this change, we will go back to the table view and click ‘Accept changes’, if you want to reject this change, simply ignore it and move on to the next section of the form that requires your attention. For the purpose of this guide we will accept this change.
Once you have worked through the form and accepted any changes you want and ignored any changes you don’t want, you can return to the collaborate dashbaord. You can quickly access this via the ‘Collaborate dashboard’ button located above the ‘Print or Download’.
You can the click ‘Mark as reviewed’ - this will pull through the changes you accepted into your form and remove any changes you ignored.
Please note that any changes not accepted will be removed upon clicking ‘Mark as reviewed’ so please ensure you thoroughly review the form.
The ‘Mark as reviewed’ button will then change to ‘Return to collaborator’, you can click this button to send the form directly back to your client. If you wish to work on the form first before sending it back, we would recommend removing the form from the client, making the relevant changes, and then adding the form back to the client.
Removing a Collaborator
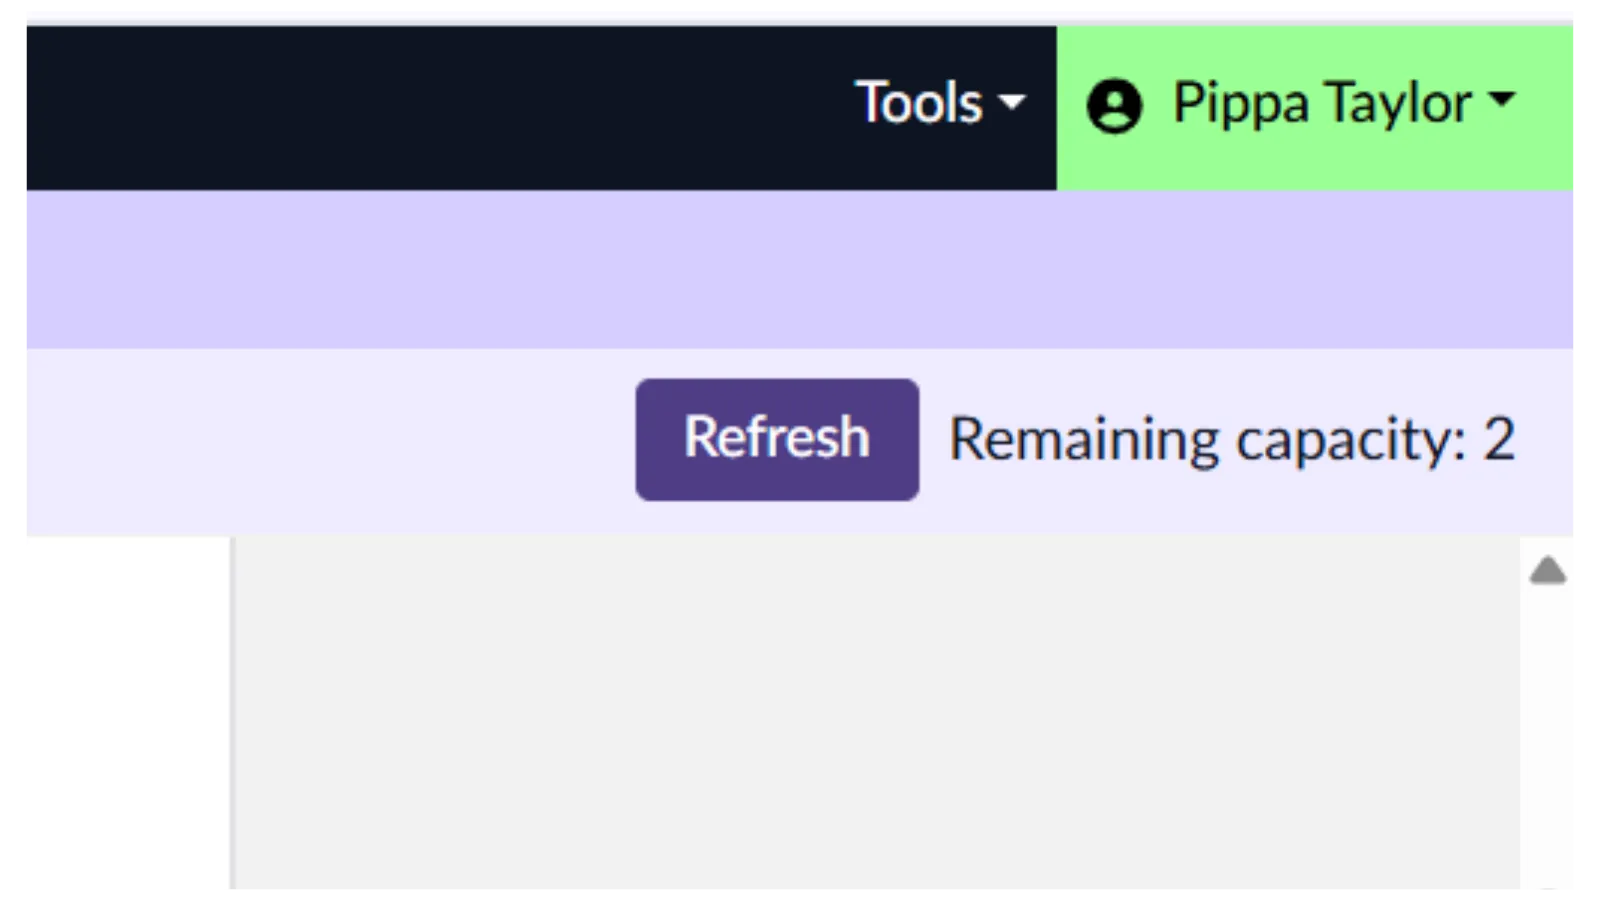
As a firm, you have a dedicated amount of Collaborate Keys, these keys determine how many cases can have a collaborator at one time. The amount of keys that available for use are shown in the top right-hand corner of the collaborate dashboard.
Once you have finished collaborating with a client, it’s good practice to remove them as a collaborator to free up a Collaborate Key. You can add and remove collaborators from a case as many times as necessary.
To remove a client you simply need to click ‘Remove Collaborator’ under their name and email address.
Please note that any changes not accepted will be removed upon clicking ‘Remove collaborator’ so please ensure you thoroughly review the case information and form.
If you have any questions or need support please email us at [email protected] or call us on 01652 652222. We are open from 9am-5.30pm, Monday to Friday.